Showing posts with label cake. Show all posts

10.30.2013

agree to disagree about red velvet cake.


i don't know about you but i am a theme girl.
love to embrace the theme.
parties. holidays.
all about the theme.

almost by accident {and by almost i mean totally on purpose} it seems that i have shared a halloween dessert here every year and even though our new diet low calorie/low cholesterol way of life has no room for sweets, there are one or two exceptions to be made.

when up late brainstorming a wicked cool idea to share with you for this year {man i have to get a life! ha!} i thought of what i had done in years past - i have done pumpkin, then chocolate & pumpkin and chocolate - and decided it was time for something totally different. time to shake things up.
almost immediately i went to red velvet cake.
halloween. blood. guts. you get the idea.
one problem though - i had fallen out of love with my recipe. i made it last christmas and found it too dense and dry. very blah.

back to the drawing board.
cake testing time.
yes i could have scoured the web and found one that would do the trick but where is the fun in that?
woah is me, eh? life really does suck around here sometimes.
;)
thankfully not TOO far into the process we struck gold.
moist. springy. beautifully RED!!
right after getting this down on paper and patting myself heartily on the back, a few request for halloween style cupcakes for this week popped up - perfect timing!

hopefully they are a hit.
what kid doesn't want to bite into something that looks like it may squirt blood back?
well i know mine would! ha!

happy halloween!!!

ps : this is not a decorating post...i stink at decorating! awful. horrible. these were actually just regular cupcakes and i attempted to change them up - make them more halloweeny. just look at that eyeball!!! yes, that is supposed to be a monsters eyeball up there with the mummy and vampire bite......i tried.
{head in hands, ashamed.}
#theytastesogoodhopefullynoonewillnotice


re-thought red velvet cupcakes
for the icing i used my classic buttercream icing.

2 1/2 cups all purpose flour....you could also use cake flour is you want.
2 cups sugar
2 eggs
1 cup buttermilk
1/2 cup canola oil
2 tsp vanilla extract
2 tbsp cocoa powder
2 tbsp water
one good squeeze of red colour - paste form. if using liquid then a tbsp - you can always add more!!!
1 tsp salt
1 1/2 tsp baking powder
1 cup boiling water
1 tsp baking soda
1 tsp apple cider vinegar

pre-heat your oven to 350 degrees.
place liners in your trays and set aside {will make approx. 24 regular cupcakes or approx. 36 mini's} or butter and flour two 9-inch pans.

in your mixer beat together sugar, eggs and oil. add vanilla. while this is mixing mix together cocoa, water and colour in a small bowl till you form a paste. add to egg mix and beat until incorporated.

in a separate bowl sift together flour, baking powder and salt.

add you flour mix, alternating with the buttermilk, to your wet ingredients - starting a stopping with the flour mix. once this is fully incorporated add your boiling water. mix together.
now comes to fancy part - in a small bowl mix together the baking soda and vinegar. now fold that into the mix gently. this makes your cupcakes rise nice and high.

now carefully fill your cupcakes liners 3/4 full - mixture is really runny - tap your pans on the counter to release some of the air and place them in the oven. 12 - 14 minutes for mini cupcakes, 20 to 22 minute for larger ones and about 30 - 35 mins for cake rounds. cupcakes are ready when they spring back when touched on the top. let cool 10 mins in pans on rack, then remove from pans and let cool completely before attempting to decorate.


2.13.2013

a cake built for two {plus enough for two short stacks.}


okay now let's switch gears.
yes i know i just told you to eat chocolate for breakfast. that valentines is all about chocolate...but you can have too much of a good thing, right?
don't you think after making the pain au chocolate, indulging in some afternoon chocolate hearts {it is VALENTINES after all?}, thankfully accepting some chocolates from your kids, husband, significant other...don't you think by 5pm you may be over chocolate just a little bit?

thought so.
ladies {and gents}...start your engines!

who doesn't enjoy a little lemon in winter?
helps with the blues. awakens the taste buds. provides us with memories of summer and sunshine.
perfect.

here i am going to let you in on my little secret...my lemon cake.

i once doubted myself about it once upon a time. i thought since i didn't have my own cookbook how could mine be any good? i should defer to the lucky and use their recipe. it's in print, has a gorgeous photo beside it. love. so i made it. i made it for a dinner party and i actually served it to people. as i took my first bite i felt my face fall. it was disgusting! how could i serve this to people?! more to the point - how could i take this away from them without them knowing and freeze time just like in out of this world, whip up THIS version and serve that instead?! WHY had i doubted myself?!

because that's my M.O. i have no confidence in myself most days. i question my decisions over and over and go to THAT place all the time. yet i know i have the skills and what i make IS delicious. i served this in my bakery for pete's sake! it was a hit! but i guess sometimes the grass is always greener......

plus i have mad respect for anyone with a cookbook - i am sort of a cookbook junkie. a collector as it were. but i knew better. in the back of my mind i was questioning why i wasn't just making mine and why was i making one that contained shortening? oh well, live and learn. so now you may question my validity here and ask yourself if mine is good enough for YOU. well i have made this enough times since to say yes it is and if you are not satisfied i shall refund your money, no questions asked. i understand. believe me.

my one hurdle with this cake - or any cake! - is the decorating.  i am not a cake decorator by any means. i think i missed that gene when they were passing them out. i can make a mean cake that will have you talking forever {yeah i know - a little full of myself there! ha!} but....you will never be talking about how pretty it looked. ever. because they are not. maybe it's that i am shaking too much after sampling the icing every 5 seconds. or that i tend to rush that part. fact is: i suck at it and i am okay with that. if THAT is my one fault {here i go again! i'm on a roll} then i can live with it.

seriously.

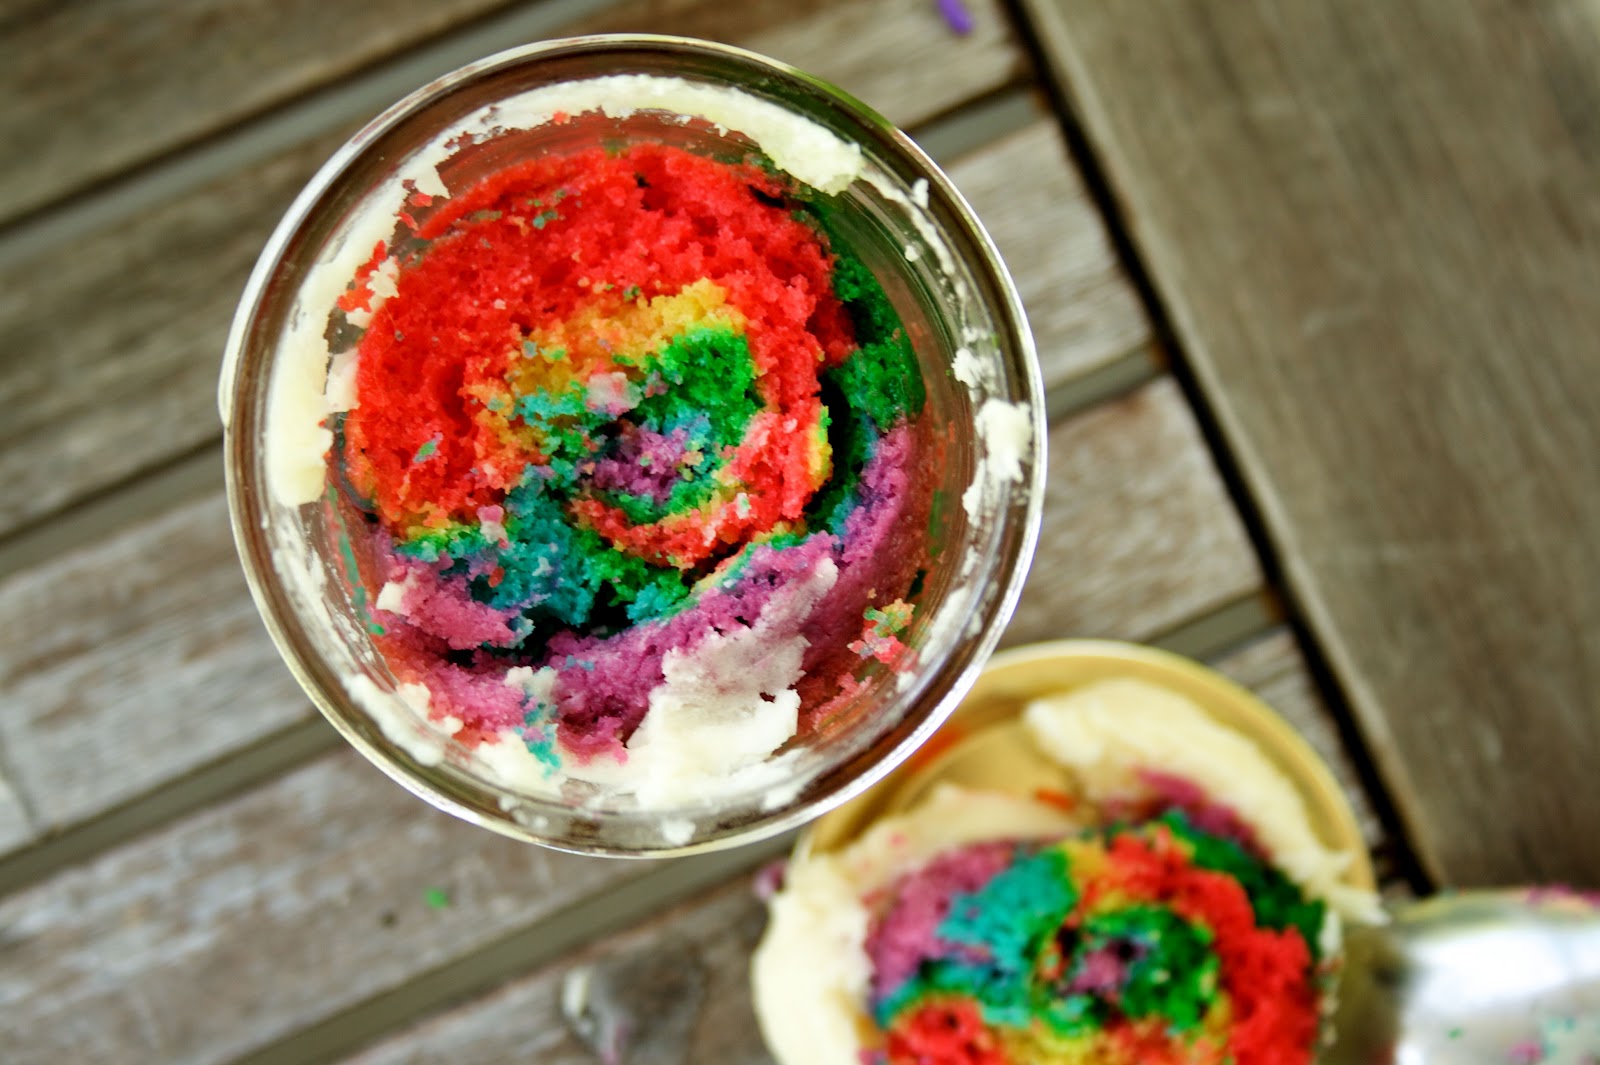
come to think of it i may start a new trend that doesn't require any decorating at all - deconstructed cakes. a chunk of cake here. a blob of icing there. some filling drizzled over the top, coulis style.
done.
not meant to be pretty and you won't agonize over it.
it will be all the rage.
i'm so cool.

;)

make this for your friends and family. they will thank you for it & love you too.

happy valentines to you and yours.
xo


meyer lemon buttermilk cake with lemon cream cheese frosting, lemon curd and a healthy dose of sweetened shredded coconut {toasted if you dare!}

the original design on this cake was inspired by stephmodo and a similar one she had made - using different taste elements though. i have gone through the steps over and over may times on how she assembled it and i am calling bulls*%t. no way she got this to be like that. no way. as she is practically perfect in every way i will give her credit on most things but i will not believe this worked for her. do it this way: schmear a blob of lemon curd over the plate and lay your slice on it sideways gently nestling it into the bed of curd.
lemon cake, deconstructed. boom!

1 cup unsalted butter - room temperature.
2 1/2 cups all purpose flour - spooned and leveled.
1/2 tsp baking powder
1/2 tsp baking soda
1/2 tsp salt
1 tbsp meyer lemon zest {using the zest you have in your freezer right??}
1 1/2 cups sugar
2 large eggs
3 large egg yolks
2 tbsp meyer lemon juice {ditto.}
1 cup buttermilk

sweetened shredded coconut.

lemon curd. recipe found here.

lemon cream cheese icing. recipe below.

for cake:
preheat oven to 350 degrees. butter and flour your tins. this recipe will make 2 9-inch rounds, 12 regular cups cakes. lots of mini's and enough for 3 3-inch layers {found great little spring form tins at homesense!} and about 20 mini's.

in a medium bowl mix together flour through to zest. set aside.

in a mixer with the paddle beat together the butter and sugar until fluffy. add eggs and yolks one at a time till incorporated. add lemon juice to buttermilk. alternating, starting and ending with flour, add the flour mix and buttermilk to your butter mix. mix until just combined and smooth.

divide batter among your pans - being sure to weigh your pans if doing cakes - and place in your pre-heated oven. bake cake layers for 35 minutes, cupcakes for 20 and mini's for 12. let cool for 10 minutes on a wire rack. run knife along edges of pans and invert cakes on to wire racks to cool completely. brush with lemon syrup while still warm if desired.

lemon syrup you ask? that's a baker's secret that i am going to let you in on! you know how you get a bakery cake and they are so moist and you never seem to get that effect at home? simple syrup is the secret.
1 cup of sugar
1 cup of water
boil this together over medium and then reduce heat and simmer for 10 minutes. remove from heat and cool slightly. for lemon now add a 1/3 of a cup of lemon juice. poke your cake with a wooden skewer or fork all over and brush with syrup. repeat a few times if you want. save the rest for later.
there you go...the big secret!


assemble your cake: trim off top, if needed, flip over so the flat bottom is up and place you cake on a cake stand or platter with parchment or wax paper tucked underneath {so you can pull it out when you are done and have a clean surface. everyone will wonder how you got your cake up there!} and brush with more syrup if you want. now spread 1/3 to 1/2 cup of frosting on the top and sprinkle the top with coconut. place the second layer on top and do the same {only add coconut here if you are going for three} and if you are going for three do that now but don't top with coconut yet. now ice the outside of the cake {crumb coat first, chill for about 20 minutes, then finish icing} and top to make one gorgeous white cake and then cover the entire outside, pressing it in, and top with as much coconut as you want!

lemon cream cheese icing:
8 oz of cream cheese - room temp
1/2 cup of unsalted butter - room temp
1 1/2 to 2 pounds of icing sugar - sifted into your bowl
2 to 4 tbsp of lemon juice

beat together the butter and cream cheese till smooth and incorporated. slowly add 1 1/2 pounds of your icing sugar and lemon juice. after adding in all your lemon juice decide whether you need more stiffness in your icing or not. if it's too runny add some more icing sugar a little at a time.


10.26.2012

let them eat cake. {chocolate pumpkin graveyard layer cake}


halloween is fast approaching and we only put our decorations out last night.
yep.
we are about a week behind.

i have really felt like that lately.
like i am a week behind and cannot catch up.
like it's all passing me by in fast motion and i am stuck in slow-motion land forgetting how long tasks actually take. over-scheduling my days and falling further and further behind. and not axing things because i want to get them done. completed.

but i am burnt out.

what i need is cake.
a cake day.
a day where we make a cake, decorate it and sit around and eat it and laugh and have a good time.
i need to forget about all the things i want to do - project life, sewing projects, tv room project, wrapping christmas present {yes you read that right.}, house decorating finishing touches.
i need to forget about all this and cut a big wedge of cake and sit there and enjoy every mouthful.
right down to the last bite.
that's what i need.
now.


and making it a halloween cake is the icing on the cake.
:)

i love cake days.


chocolate pumpkin graveyard layer cake.
this cake has pure pumpkin in it {read about roasting your own pumpkin here}. tastes delicious and doesn't make you feel ssoooo guilty as you cut yourself another wedge! because lets face facts - you ARE going to enjoy a second slice!!


1 1/2 cups of all purpose flour
2/3 cup cocoa
2 tsp baking powder
1 tsp baking soda
1/2 tsp salt
1/2 cup buttermilk
1 cup home roasted or canned real pumpkin (not pie filling)
2 tsp pure vanilla extract
3/4 cup unsalted butter - softened
1 cup dark brown sugar
1 cup white sugar
3 large eggs and one egg yolk

milano or monaco cookies
1/2 cup semi-sweet chocolate chips
old fashioned butercream {recipe follows}
bittersweet chocolate glaze {recipe follows.}

Pre-heat oven to 375'F.
butter and line with parchment {butter your parchment as well} two round cake pans - 8inch or 9.
Sift together flour, cocoa, baking powder, baking soda and salt. Stir the buttermilk, pumpkin and vanilla extract together in a small bowl.
In an electric mixer beat together the butter and sugars until light and fluffy. Add the eggs one at a time and the yolk and beat until well incorporated. Reduce mixer speed and alternately beat in flour mix and buttermilk mix in thirds.
evenly distribute batter between pans. {i weigh my pans.} tap lightly on counter to release air bubbles, place in oven and bake for about 35 mins or until tester inserted in middle comes out clean.
Remove from oven, place on cooling rack and cool in tray for 10 mins. Remove from pans and let cool completely before icing.
Keep at room temp in a air-tight container for up to 2 days (best) or refrigerate for up to 5 days but bring to room temp before serving.

old-fashioned buttercream icing
3/4 pounds of unsalted butter - softened {the butter from above makes this portion slightly shy of 3/4 of a pound....that's okay.}
500 grams sifted icing sugar
6 to 9 tablespoons milk
3 teaspoons pure vanilla extract
gel food colouring

in an electric mixer blend butter till all nice and creamy. scrape down sides of bowl. in little bits, start adding icing sugar and blend after each addition. also start adding milk as well. when all incorporated add vanilla extract. keep tasting along the way for desired sweetness and consistency. once perfected tint away to your heart desires!
i tinted orange for this - obviously.

Bittersweet chocolate glaze
4 oz bittersweet chocolate - chopped
1 tbsp unsalted butter
3 tbsp light corn syrup
1/2 cup heavy cream

Place chocolate, butter and corn syrup in a heatsafe bowl. Heat the heavy cream over low to medium heat and bring to a boil. Remove from heat and pour over chocolate mixture. Let stand for 3 minutes. Stir gently with a whisk until all the components are blended and smooth. Let stand for 3 - 5 minutes to thicken.

to assemble this cake:
use some of the orange icing for the center. then make sure you do a crumb coat - take a small portion of the icing and spread a thin layer over the outside to seal in the crumbs. let set for about 15 minutes {in the fridge if you can.} then ice the rest of the cake concentrating more on the sides. then add the glaze. test it by seeing if it coats the back of a spoon with out too much run off. pour right in the center of the cake and let it organically run over the sides {you can give it a little push here or there.}.

the cookies:
melt some chocolate in a bowl in the microwave in 15 second increments, stirring between times. once melted pour into a parchment cone or ziplock baggie with the corner cut. pipe out your lettering and let set.

once glaze is set on cake insert your "tombstones" into the cake. your cemetery is complete!

happy halloween!!!

9.14.2012

project: d.i.y. cake topper bunting.


so today i am going to talk about the cake topper that i made.
sorry it's two days late....
do you ever have a couple of days that you would like to extract from the calender and throw then away because one day was the result of someone being up all hours of the night and became too tired to funtion & the next was a colossal waste of time between car garages and the insurance place?
so yeah...i would like to strike those days from the record counselor! {see i could have been a lawyer..}
and today i am getting a migraine but i am determined to share this with you! 
so....on with the show!


and there you have it!
i admit for the poles my dowels may have been a touch on the thick side and if it doing for cupcakes i would use wooden skewers and wrap the twine around the pole a couple of times and tie it off {like a hair wrap...remember those? did you ever get one on vacation?}.
also i used fabric as i have all this amazing fabric which i am doing amazing things with but if you have a collection of great paper by all means use that as well.

that's it!
i hope you use this idea and i would love for you to paste your links in the comments so i can see your creations too!!
happy crafting!

:)


9.11.2012

to celebrate.


today we celebrated.
today we celebrated back to school.

i love celebrating the little things in life as well as the big and i think this falls somewhere towards the big but maybe still closer to the middle....or is it just an excuse for cake?...hhmmm.....

i don't know who the celebration is for though...the kids....

or me??

:)


the cake recipe can be found here {the filling i used is the ganache} and the buttercream recipe is here


6.22.2012

wonderland cakes.


for aydan's birthday i wanted to do something extra.
something unexpected.
something a little different.
we made wonderland cakes.

what are wonderland cakes you ask?
they are rainbow layered cakes baked in jars, naturally.
they are the type of cakes that one would expect to see in wonderland.
layered colour upon colour upon colour. vibrant and wonderful.
something unusual and perfect for this tea party.

they fit in magically.


i had seen this done before and piggy baking on her idea i made my own version. {she had used a cake mix - i did not. she used pastels - i went for vibrant.}
i loved this.
the kids loved it.
they were the perfect addition.
and they tasted great!
that's the main thing right?
but the look does count for something as well.....you gotta give me that!


wonderland cakes {baked right in the jar!!}
makes 16 jars.
top these with my classic buttercream icing. yum.

18 tablespoons of unsalted butter - room temperature
3 cups sugar
6 extra large eggs - room temperature
1 cup sour cream - room temperature
1 1/2 tsp pure vanilla extract
1 lemon - zested
3 cups all-purpose flour
1/3 cup cornstarch
1 tsp kosher salt
1 tsp baking soda
lots of different gel colours - i use gel because you get maximum colour with little dye - you can taste dye if you use too much.

16 x 250 ml canning jars
ziplock style sandwich bags - as many as as many colours you want.

preheat oven to 325 degrees. wash and dry your jars - i used 250 ml canning jars for this.
plus have your ziplock bags ready.

cream the butter and sugar on medium till light and fluffy. scrape down the bowl then while mixing add your eggs one at a time. scrape down bowl then add your sour cream, vanilla and lemon. mix well on low.

sift together the flour, cornstarch, salt and soda. slowly add the flour mix to the wet mix. finish by hand to make sure it's all incorporated but being careful not to overmix.

dived the batter up between bowls and add your colour and mix gently. pour your coloured content - one colour per bag - into your bags. now you add them to the jars. when the process is done you want your batter to fall somewhere between 1/3 of the way up the jar and half way up.


also you might want to clean up your sides - we seemed to skip that step!
now pop them in the oven for 45 minutes. seems like a long time but that's the time!! then remove from oven and insert a tester in them to check that they are done. let them cool completely on the tray on a wire rack, ice them and close them up! a tip: do not add sprinkles to them {if using} till just before you serve them - if left over night some brands end to bleed into the icing and those they do not serve in wonderland!
hope you enjoy!

5.02.2012

a little bit of this, a little bit of that.

it has been one of those weeks.
the kind where the goal is the widdle down the to-do list.
the dreaded to-do list.
that one where you are all ambitious to what you can accomplish in a day, a week, that no matter how hard you try and how busy your day seems you really only get one or two things crossed off? {except of course if you put laundry, dishes and vacuuming down - which i sometimes do to make myself feel better....}

things on my list right now:
  • pay hydro
  • set up monthly equal billing on hydro
  • photoshop selected photo's
  • order photo's
  • blank blank blank for summer
  • steam clean kitchen
  • laundry
  • email meg re: bunting and aprons
  • aydan's tutu
  • sand down door tops
  • orange peel cleaner
  • week in the life
  • december daily
to name a few. it happens to be longer but i won't bore you with all the gory details.
although i have been super busy...in three days i have done three things of my "list."
blerg. ugh.
{notice i actually did put laundry down so i could cross something off!}

plus my constant companion has been a chest cough which makes me sound like i smoke 2 packs a day and gave me a rough sleep last night. no aches and pains anywhere else. just this awful cough.


monday was actually nice {cough and all} and not filled with 60 mile per hour icy winds so we took to the outdoors, going to the park and fixing up the yard.
progress was made - beds were prepped, plants were assigned and now it's been raining for two days.
really??!!

on the weekend we got a box of goodies from my mom and in it were leather jackets for the kids.
they rocked them all weekend and then aydan sported hers to school on monday.
too cute is all i have to say.


tuesday we took to the comfort and shelter of the house {since the rain continued} to do the dreaded house work.
floors and laundry were on the agenda and i did feel rather accomplished when it was all said and done.
even made it to the second floor after the main and basement were complete.
pat on the back - i earned it.

made this for dinner in celebration of the husband being able to join us - he left work the previous night at 12 midnight! poor fella.
it was so good!! broke down and bought the sherry - will be put to good use when i make this a million times over & i bought that fast fry steak which i would normally do this with it but it went with this recipe perfect.

and we ended the meal with this.....to celebrate my extended elliptical time.
i keep adding more time without the huffing and puffing. getting up there.

you will find the recipe here. {next time i will add the oats.}
and you're welcome.

today has a rather gloomy outlook outside so inside has been the top choice for everyone again.
kitchen is actually clean. {amazing!!}
house looks okay. {double yeah!!!}
so i am going to let you peek on the next project.....the tv room.

we are going to paint the walls gray & trim white, add curtains - i'm thinking white and green thick striped, create a desk/computer area behind the couch, some new decorative pieces and a new light fixture.
a new couch would be heaven but the dollars DO NOT stretch that far. too bad, so sad.

this was lunch for my today:

trying real hard to work off the 20 extra pounds i am carrying.
was really good and had most of this for good measure....


but i can't stop thinking about the black bottom cookies hiding in the bread box!!!
what's a girl to do???

for tonight we are going to have poached eggs, pumpkin waffles and bacon {for coop}.
i need to incorporate spinach in there somehow.....or maybe some sweet potato hash.
something.

also i would love to wish our niece jamie a wonderful 18th birthday!!! happy birthday darling and i hope you have a very special day. we are thinking of you. xoxo

{this post took to long to write and i had a cookie. oh crap.}


10.18.2011

blog-a-versary.


well here we are! happy first birthday to this blog.

over the weekend this little hideaway of mine turned one. i had decided to start blogging again after moving across the country and getting settled in. it has been the ultimate diary for milestones of the kids, recipes to cherish & share, memories to be etched in stone and for me to have a creative outlet of sorts.

i would like to thank all our friends and family & fellow bloggers out there for reading it first off {!}, for leaving kind comments of praise and encouragement, for inspiring me and, in some cases, lending me their stories. without you all i don't know where i would be. and of course to the husband for all his support on this and for his help with late night photo sessions. also i really had no idea how the comments section would affect me in this endevour. i thought of it first as a cheeky little function that i really didn't think would matter but it's amazing the weight they carry. the thoughts. the encouragement. the new friends that have been made from that little box. the actual joy i feel when i see that there is a comment under there for me. me! i would like to thank everyone who has left a comment for me {or has figured it out apparently - darn google!}. surprisingly they help me to carrying on in this and mean more than you would ever know.

as i am still trying to find my voice, my theme, my goal, i truly do love what has happened here. what this blog has evolved into and what it means to me. the path chosen has never really been defined and has no specific focus but if you know me personally you will realize i embody all those as well. one of my favorite quotes from a movie is "i want to be a novelist, a weekend, flautist, a potter, a painter, an architect...." it was a young girl wanting to be it all and herself at the same time. sometimes that's how i feel. i have wanted to focus this into a food blog and it seems right but then one of the kids steals my heart and i want to share that. i discover a new craft or way of doing something and want to let you all in the secret too. and then when i just want to get it all out and talk to y'all, there are those days as well. so i said forget it on the theme and it will just be a reflection of dear old un-focused, projects on the go everywhere, job title: mom, closet baker & foodie, me.

and in true experience the wonderful fashion we celebrated with a cake!! i made my caramel apple cake which i thought fitting to the time of year as well as the occasion. after we went apple picking and found that particular variety not quite to our liking the wheels have been turning. first out of the gates is this lovely cake that i have adapted from a rachael ray tear out. the thing i love about this cake is the sponge. it would work on it's own dusted with icing sugar and a hefty blob of vanilla whip cream, with this wonderful caramel icing i'm going to share or even with possibly a fresh raspberry filling and raspberry icing. and also if apple chunks are not your thing, leave them out and just fill the cake with icing or a drizzle of the dulce de leche. {i will wait a moment as you stop licking your lips!}


so here we are! we have been here for a year and i hope we can stick around for a little while longer - i kind of like this blog thing and i like hearing my words on the screen. i have put the GFC function back up in the side bar so please sign up and join us in experiencing the wonderful of our life and yours!


caramel apple layer cake
adapted from rachael ray.

2 1/4 cups flour
1 1/2 cups sugar + 1/3 cup extra
1 tablespoon baking powder
1 tsp salt
1 pound unsalted butter + 3 tablespoons, softened
3 large eggs + 2 large egg yolks
1/2 cup + 3 tablespoons of heavy cream
1/2 cup unsweetened apple sauce
2 teaspoons vanilla extract
3 crisp apples (about one pound), i used lobo but you can also use gala, peeled, cored and thinly sliced
3 cups icing sugar
1/2 cup dulce de leche (or 1 cup regular caramel sauce)

1) pre-heat oven to 350 degrees. generously butter and flour 2 9-inch cake pans. set aside.
2) using an electric mixer, combine the flour, 1 1/2 cups granulated sugar, the baking powder and salt. mix in 1/2 pound {one cup or 2 sticks} of softened butter at low speed until the mixture is crumbly.
3) in a separate bowl whisk together the eggs, 1/2 cup of cream, applesauce and vanilla. in a slow stream add to the butter-flour mix at medium speed until smooth, about one minute.
4) divide batter amongst the prepared pans, weighing for accuracy and taping slightly on the counter to release air. place on middle rack of pre-heated oven and bake until springy to the tough and a toothpick inserted in the center comes out clean, about 35 to 40 minutes. transfer to a rack to cool for 10 minutes. run a knife along the edge to release the layers from the pan, invert on to the rack and cool completely.
5) in a medium skillet, melt 3 tablespoons of butter over medium-low heat. add the apple slices and remaining 1/3 cup of sugar and cook, stirring often until the apples are tender and the juice is syrupy, about 15 minutes. stir in the remaining 3 tablespoons of cream and simmer for 3 minutes. remove from heat and let cool.
6) meanwhile, using an electric mixer, bet the remaining 1/2 pound {1 cup or 2 sticks} of butter and the icing sugar until light and creamy. with the mixer on low, slowly pour in the caramel sauce.
7) place one layer on the cake plate. spoon on the apple mixture; spread the apple filling evenly on top then cover with the second layer. using an offset spatula or butter knife, first make your crumb coat with the icing, allow the cake to set for 15 minutes in the fridge before eventually covering the entire cake with the remaining icing, swirling the top and sides to make a decorative pattern.


9.14.2011

a winning combination.


here we go. we are in the home stretch of saying goodbye to summer having one last dose of sun and humidity and i had to do it. i had to make the cake that had been on my mind all summer, so come late fall when i probably would have done it i don't look like a complete fool. late fall is for cranberries, apples, cinnamon...you get it - not lemon and blueberries.

oh - lemon and blueberries is, i think, my new favorite combo.

the way they went together was amazing. i'm still scratching my head as to why i have never gone this route before. it. worked. perfect.

i really feel like this has been my summer for lemons. all season you would be able to find lemons in decorative containers adorning my counters as i was wanting them at my fingertips as much as possible. wanting to remember them and use them. to take full advantage of their brightness and taste of summer. constantly juicing them and rasping them for their fragrant zest. savoring them.

baking is where i find my calm. the research, the reading, the planning, the hoping it will turn out. i love to create something and watch it be enjoyed for a grand celebration, a special tea party treat or just because. this was a just because kind of day. this was a friday that was like any other. a friday that marked the end of a long week, the first real week of school as well as it was gordon's birthday (our big hairy companion) and that in it's self was cause for a little celebration.

i used the strawberry cake i had told you about at the beginning of the summer as a jumping off point then i tweaked. and i tweaked. and then it was perfect. what an amazing base this is and so easy to work with. the ratio between lemon and berry was perfect. keeping the berries whole allowed some to burst in your mouth when you bite down - which was both surprising and luscious. this is definitely a forever cake that will be going into my rotation and i'm eager to tweak it to compliment the coming season.


lemon blueberry just because cake.
adapted from smitten kitchen.

now even though i call this a just because cake it can be enjoyed to mark then end of a fabulous meal as well. serve it at the end of a lovely steak, lamb or pork dinner when chocolate just might be a little too much and this will be a satisfying alternative completing the meal out perfectly. give it a light dusting of powdered sugar just before serving or if you want to go the extra mile, pair it with vanilla whip cream or homemade semifreddo. also served to a special guest or two at tea time would be a wonderful treat.

6 tablespoons unsalted butter plus more for dish.
1 and a half cups of all-purpose flour.
1 and a half teaspoons of baking powder.
half a teaspoon of salt
1 cup plus two tablespoons of sugar
1 large egg
1/2 cup milk, room temperature
2 tablespoons lemon juice
zest of one lemon (at least two teaspoons) - toss in a tsp of flour to separate them.
1 pound of blueberries. if using frozen make sure they are thawed, rinsed and dried.

pre-heat oven to 350 degrees. butter a 10 inch or 9 inch deep pie dish and set aside.

whisk together flour, powder, zest and salt. set aside. in a larger bowl beat together the butter and sugar till light and fluffy - about 2 to 3 minutes. add the egg and lemon juice. add 1 third of the flour mix and then the milk until just combined. add the rest of the flour mix gradually.

pour mix into the prepared pan and top with the blueberries covering the entire surface - i found not such a heavy concentration in the middle worked best. sprinkle the two tablespoons of sugar over top.

bake cake for ten minutes then reduce heat to 325 degrees and bake until golden brown and a tester comes out clean (some gooey fruit on the tester is okay), about 50 to 60 minutes. place on a wire rack to cool and cut into wedges and serve.

can be stored for two days, loosely wrapped at room temperature, if it survives the night.

5.04.2011

on a quest.


a few months ago on facebook i announced a quest that i would be embarking on. a quest that only a few would dare to take on but i was up for the challenge. the goal: to be come known for my chocolate cake. to be invited places for my chocolate cake - the be the-girl-with-the-kick-ass-chocolate-cake-recipe. i want to be that girl. and you know what - i succeeded.

the task: gather recipes and my stellar know-how and make as many chocolate cakes as it takes.  
we did. we tasted & reviewed. we have a winner.

as previously stated we were the proud owners of a little baking company so anything baked is near and dear to my heart. and perfecting it is even dearer. this also goes along with my word for 2011 - chef. to gather a gaggle of winning recipes that i can call my own an be very very proud of. to become the baker i want to be and eat good food along the way. and of course as you to join us for this journey.


this one is so good! rich, moist, no strange after-taste. i am in love. we tested it against our favorite two martha stewart recipes and this one won hands down. i found it on-line, changed a few things and am proud to call it my own. this has been made smeared happily with our classic buttercream but topped with this ganache makes it a rich royal dessert. i have made many a chocolate icing that i have not been a fan of but this one takes the cake! simple. rich. pure. delicious. the perfect ending to any meal or the perfect accompaniment to afternoon tea. you are probably asking yourself - why would she share this? why would she let us in on her secret? - well i'm just that kind of girl!

as we head into birthday season around these parts i have a feeling this page in my cookbook will end the summer with smears of chocolate and oil droplets all over. it will be used & used  - in a variety of forms; cupcakes, layer cakes, possibly the base for a yule log - until we find another quest to embody what we would like our cake selections to be. to cater to our never ended demand for something sweet & satisfying to cap off that perfect celebration.


moist chocolate cake with ganache frosting
2 cups of sugar
1-3/4 cups all-purpose flour
¾ cup cocoa powder - sifted. always, always!
1-1/2 tsp baking powder
1 tsp baking soda
1 tsp salt
2 eggs
1 cup whole milk
½ cup vegetable oil
2 tsp vanilla
1 cup boiling water


ganache frosting
1 cup heavy cream
8 oz good chocolate


for the cake:

Grease and flour two 9” (23 cm) round baking pans.
Stir together sugar, flour, cocoa powder, baking powder, baking soda and salt in a large bowl. Add eggs, milk, oil and vanilla; beat on medium speed of an electric mixer for 2 minutes. Stir in boiling water - coffee could be substituted here, might try that next time. (The batter will be thin.) Pour batter into prepared pans. be sure to weigh your pans to have equal portions.
Bake in a preheated 350F (180C) oven until a wooden pick or cake tester inserted in the center of both cakes comes out clean, about 30 – 35 minutes. (mine were 35 minutes).
let cool for 10 minutes, then remove from pans onto wire racks. cool completely. makes 8-10 generous servings.


for the frosting: 
bring the cream to a boil over low heat. meanwhile chop your chocolate and place in a heat proof bowl. once the cream has boiled pour over the chocolate and stir from the center until all the chocolate has melted, there are no traces of cream and it's all shiny. let sit until thickened. Ice your cake - center and outside. rich and yummy!


**I prefer to leave it at room temperature the set but if you have to place in the fridge, bring it back to room temperature (double boiler very quick or just leave it on the counter) and then whip in an electric mixer to get it to spreading consistency.


**update: i completely forgot to mention that make two batches of the recipe for the frosting. i use one for the center and one for the outside. makes it ridiculously rich but why not do it all the way?? just saying.