Showing posts with label dessert. Show all posts

10.30.2013

agree to disagree about red velvet cake.


i don't know about you but i am a theme girl.
love to embrace the theme.
parties. holidays.
all about the theme.

almost by accident {and by almost i mean totally on purpose} it seems that i have shared a halloween dessert here every year and even though our new diet low calorie/low cholesterol way of life has no room for sweets, there are one or two exceptions to be made.

when up late brainstorming a wicked cool idea to share with you for this year {man i have to get a life! ha!} i thought of what i had done in years past - i have done pumpkin, then chocolate & pumpkin and chocolate - and decided it was time for something totally different. time to shake things up.
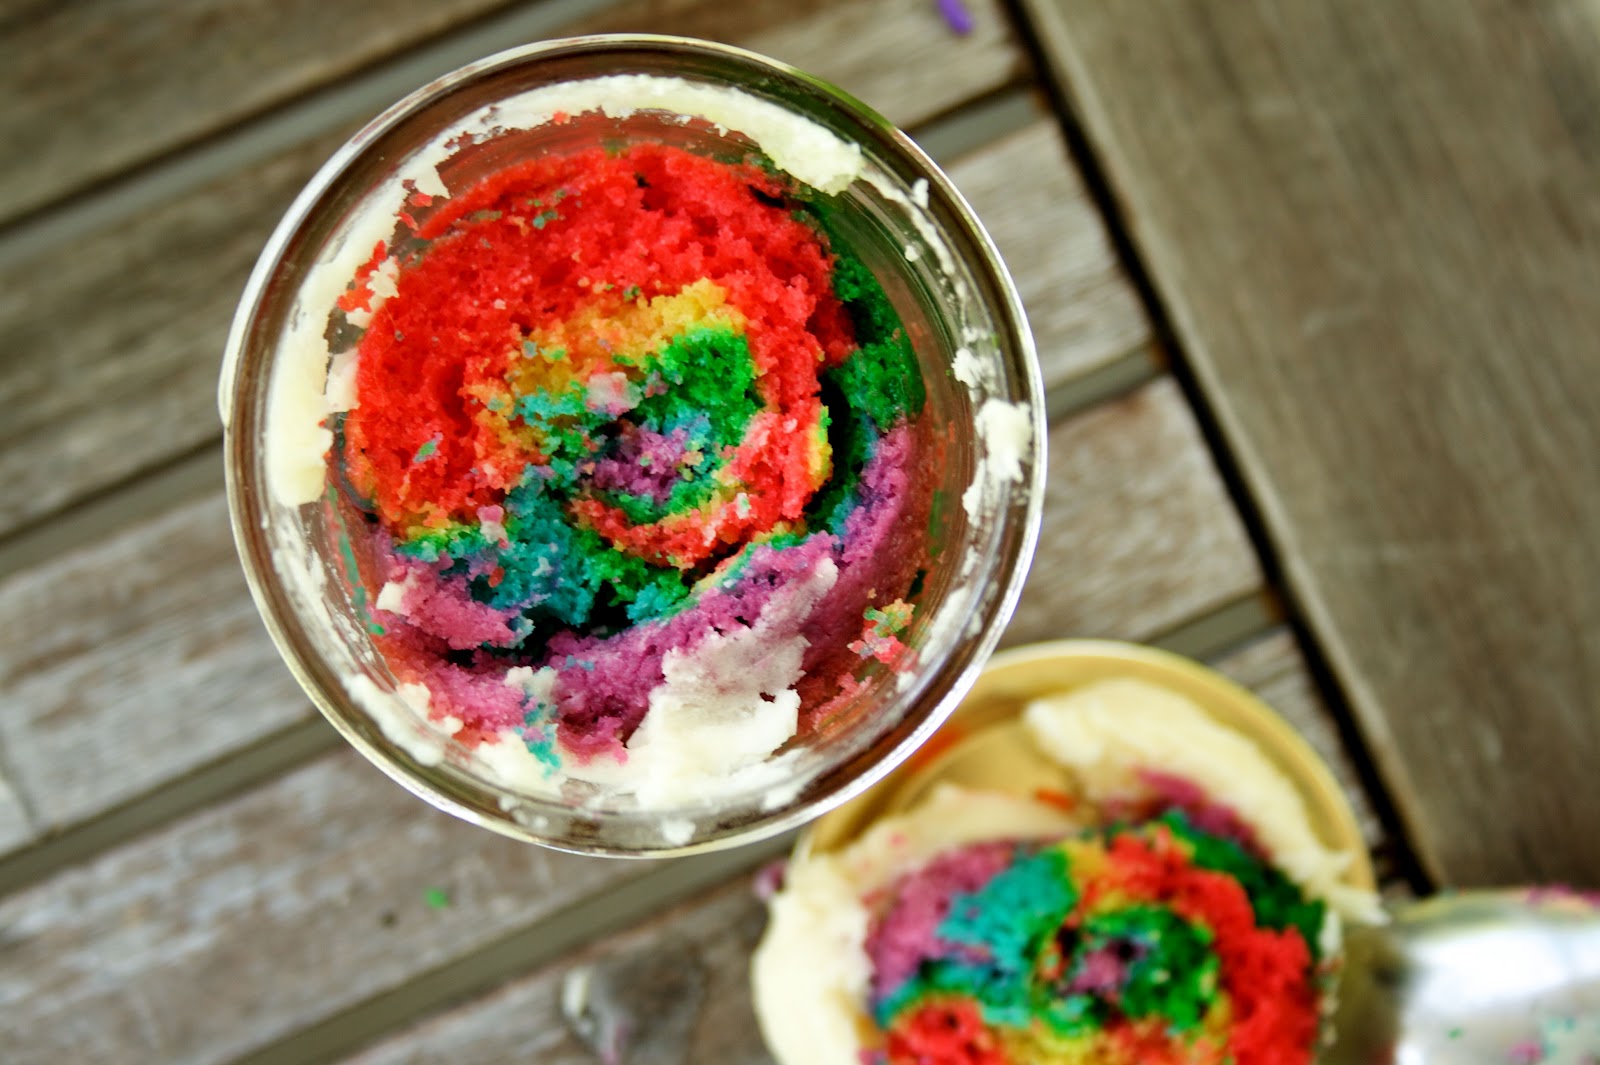
almost immediately i went to red velvet cake.
halloween. blood. guts. you get the idea.
one problem though - i had fallen out of love with my recipe. i made it last christmas and found it too dense and dry. very blah.

back to the drawing board.
cake testing time.
yes i could have scoured the web and found one that would do the trick but where is the fun in that?
woah is me, eh? life really does suck around here sometimes.
;)
thankfully not TOO far into the process we struck gold.
moist. springy. beautifully RED!!
right after getting this down on paper and patting myself heartily on the back, a few request for halloween style cupcakes for this week popped up - perfect timing!

hopefully they are a hit.
what kid doesn't want to bite into something that looks like it may squirt blood back?
well i know mine would! ha!

happy halloween!!!

ps : this is not a decorating post...i stink at decorating! awful. horrible. these were actually just regular cupcakes and i attempted to change them up - make them more halloweeny. just look at that eyeball!!! yes, that is supposed to be a monsters eyeball up there with the mummy and vampire bite......i tried.
{head in hands, ashamed.}
#theytastesogoodhopefullynoonewillnotice


re-thought red velvet cupcakes
for the icing i used my classic buttercream icing.

2 1/2 cups all purpose flour....you could also use cake flour is you want.
2 cups sugar
2 eggs
1 cup buttermilk
1/2 cup canola oil
2 tsp vanilla extract
2 tbsp cocoa powder
2 tbsp water
one good squeeze of red colour - paste form. if using liquid then a tbsp - you can always add more!!!
1 tsp salt
1 1/2 tsp baking powder
1 cup boiling water
1 tsp baking soda
1 tsp apple cider vinegar

pre-heat your oven to 350 degrees.
place liners in your trays and set aside {will make approx. 24 regular cupcakes or approx. 36 mini's} or butter and flour two 9-inch pans.

in your mixer beat together sugar, eggs and oil. add vanilla. while this is mixing mix together cocoa, water and colour in a small bowl till you form a paste. add to egg mix and beat until incorporated.

in a separate bowl sift together flour, baking powder and salt.

add you flour mix, alternating with the buttermilk, to your wet ingredients - starting a stopping with the flour mix. once this is fully incorporated add your boiling water. mix together.
now comes to fancy part - in a small bowl mix together the baking soda and vinegar. now fold that into the mix gently. this makes your cupcakes rise nice and high.

now carefully fill your cupcakes liners 3/4 full - mixture is really runny - tap your pans on the counter to release some of the air and place them in the oven. 12 - 14 minutes for mini cupcakes, 20 to 22 minute for larger ones and about 30 - 35 mins for cake rounds. cupcakes are ready when they spring back when touched on the top. let cool 10 mins in pans on rack, then remove from pans and let cool completely before attempting to decorate.


12.05.2012

one has to post about chocolate at christmas.


sooo...the other day i went to my trusty food log here on the good old blog only to see that i did not have chocolate ganache listed! how can that be?? i was shocked so i decided to do something about it.

make this today or tomorrow and check back on friday...i'm going to show you what to do with it!

what would christmas be without a chocolate post?

chocolate ganache
8 oz good quality semi-sweet, milk or dark chocolate
1 cup of whipping/heavy cream
peppermint or orange extract {optional}

chop up your chocolate into fairly small pieces. place in a heatproof bowl. heat your cream on the stove until just boiling {tip: do not put on heat and then go outside to perfect your photography skills for said post...just saying} pour hot cream over chopped chocolate, let sit for one minute then, starting in the center, stir cream into chocolate till shiny and smooth and no more cream in visible. **if using extract now would be the time to add it - i would start with 1/4 teaspoon at a time and do it to taste...peppermint extract is super strong, i don't remember about the orange. to be on the safe side taste as you go! set aside and let cool till firm. {you can stick it in the fridge just let it get set out in room temp, cover with plastic wrap making sure the wrap is right on the chocolate mix then chill till needed.}


10.05.2012

at last...dessert. {pumpkin cheesecake & pumpkin pie}


so here we are.
where is that you asked? we are at the best part of the meal. at the part, where even if your pants are feeling a little tight, you are still looking forward to that sweet treat. that hit of pumpkin and cinnamon that is synonymous with thanksgiving. the dessert that screams fall. the thing that caps off the night so well that you welcome those heavy eyelids and fall to sleep with a smile.

for us, that dessert is usually pumpkin cheesecake OR pumpkin pie. {sometimes there is both...you just never know what people are in the mood for!}. i have made many a pie & cake over the years and have come to settle on a few recipes that i think...take the cake? {too much??}

12 years ago i had my own little apartment in downtown vancouver - well kitsilano to be exact - a hop skip and jump from the beach. finally i had felt like a grown up. no more commuting from the north shore. no more feeling like i had someone to answer too {although i really didn't}. i was independent.
it was because of this that i decided to hold a proper grown up dinner party.
to host my own thanksgiving.

{i was so excited.}


i invited 10 people from different parts of my life - some knew each other, some became fast new friends.
the obstacle - my apartment was small. and it was lots of rooms - how i like it. not very conducive to hosting a dinner party but it did have a great feature - the walls between the bedroom and living room opened. so here is where i decided to rent a table and chairs + dinnerware & stemware - i wasn't messing around - i pushed my bed up against the back wall, set up the table and chairs in my bedroom and opened the wall up between my bedroom and living room and really you had no idea you were dining in my room! i brought in pumpkins and corn stalks, waxed leaves for decor, lots of candles and set the mood.
i felt like bridget jones fixing her own birthday dinner for all her friends. the catch: mine actually turned out! i roasted a salmon, made chevre mashed potatoes, glazed carrots, stuffing {of course} and brussel sprouts. but the two things i was most excited about were my desserts. i should have known then where my life path was to take me, i was just too stubborn.
it was at this meal that i was introduced to my ability to make desserts.
i made 2 pumpkin pies and a pumpkin cheesecake.


i never knew that desserts could taste like this. okay check that...i never knew that dessert I MADE could taste like that. they were wonderful and thus commencing my role as pumpkin dessert maker from that day on. and i was proud of it.


pumpkin cheesecake
crust:
2/3 cup of butter
3 tablesspoons of sugar
a pinch of kosher salt
2 cups graham cracker crumbs
1/2 teaspoon cinnamon
1/4 teaspoon nutmeg

filling:
3 8oz packages of cream cheese, softened
1 cup of sugar
1/4 cup of flour
4 large eggs
2 cups pumpkin puree {homemade or canned}
2 teaspoons of cinnamon
3/4 tsp of nutmeg
1/4 teaspoon of all-spice
1 1/2 teaspoons of pure vanilla extract

preheat oven to 325F.
crust: combined all the ingredients together. press into the bottom {and up sides - optional} of a 9 inch springform pan. bake the crust, on a rimmed sheet, for about 10 minutes. remove from oven and set aside. leave oven on.

filling:
in a large mixing bowl, beat creamcheese and sugar together until light and fluffy. beat in flour and add eggs one at a time while neating. stir in pumpkin, cinnamon, nutmeg, all-spice and vanilla. pour over crust.

bake for about 1 hour and 20 minutes, until the center is raised and set. turn off oven, open the door slightly and let cool in oven for about 2 hours. this prevents cracking on top. if you can't do this step ie: there are kids running around - remove from oven, put on a wire rack and let cool to room temperature. cover with plastic wrap and refrigerate {still in the pan! do not remove the side portion of your pan!} for at least 6 hours or overnight. if you do end up getting a crack down the middle put a big dollop of the vanilla whip cream you are whipping up to serve with it anyways!


pumpkin pie
for the crust i use my sweet classic pie dough.

one batch of pie dough.
1 cup brown sugar
1 tablespoon of cornstarch
1/2 teaspoon salt
1 teaspoon of ginger
1 1/2 teaspoon of cinnamon
1/2 teaspoon of nutmeg
1/8 teaspoon ground cloves
1 1/2 cups pumpkin puree {homemade or canned}
3 large eggs {lightly beaten}
1 1/2 cups evaporated milk

1 tbsp heavy cream
one extra egg

turn on your oven to 425F.
roll out your pie dough, place it in your pie plate & decoratively pinch edges. freeze crust for 30 minutes.

meanwhile mix together the sugar, cornstarch, salt, ginger, cinnamon, cloves, pumpkin, eggs and milk.
in a small bowl beat together the egg and heavy cream. when 30 minutes is up get your pie shell and glaze your edges with your egg mix. add pumpkin mix.

bake for 10 minutes then reduce he heat to 350 an bake for 60 minutes more {check it at the 50 minute mark - if the center is still wobbly leave it in for 5 minute increments. turn off oven and open door and allow to cool in the oven to prevent cracking. if you can't do this step ie: there are kids running around - remove from oven, put on a wire rack and let cool to room temperature. if you do end up getting a crack down the middle put a big dollop of the vanilla whip cream you are whipping up to serve with it anyways!

7.12.2012

sour cherry slab pie. {from the archives.}


everyone is doing it.
so since i HAVE done it i thought i would offer my two cents.
i'm talking about slab pies. the most genius thing ever invented.
i love them and this is why:
they feed a crowd.
they are forgivable.
they are drizzled in glaze.

sold yet?
i have seen many a variety made & showcased but have yet to see one offering sour cherries so i thought i would wriggle my big toe in here and reserve the spot.
can you guess how in love with this pie i am?
i disappeared as soon as it arrived as did the cherry season {for this variety} so we got what we got.
what we got was good.
flaky. syrupy. sweet. and just the right bite of tart.
perfect.

i think i may have to hunt some down now......


sour cherry slab pie
from the angus family cookbook submitted by me.
Yield: Varies, but I cut mine into 20 2 1/2-inch by 3-inch pieces

1 1/2  All Butter, Really Flaky Pie Dough (recipe down below), divided, patted into thick rectangles, wrapped in plastic and chilled for at least an hour in the fridge
6 cups sour cherries, pitted (fresh or frozen will work; if frozen, defrost and drain first)
3/4 to 1 1/4 cups of sugar*
1/4 cup cornstarch
Juice of half a lemon
Pinch or two of salt
2 tablespoons heavy cream or one egg, beaten with a tablespoon of water


Glaze:
1 cup confectioners’ sugar
1 to 2 tablespoons milk or water or 1 tablespoon water plus 1 tablespoon lemon juice (I did this to make the glaze more interesting)


Preheat oven to 375°. have your half sheet pan ready.


In a large bowl, combine cherries, sugar, cornstarch, lemon juice, and salt. Stir to combine; set aside.

On a lightly floured surface, roll out the larger piece of dough into an 18-by-12-inch rectangle. I won’t lie: this can be kind of a pain because it is so large. Do your best to work quickly, keeping the dough as cold as possible (and tossing it in the freezer for a couple minutes if it softens too quickly; it is summer after all) and using enough flour that it doesn’t stick to the counter.

Transfer to a 15-by-10-by-1-inch rimmed baking sheet, (pastry will hang over sides of pan). I went ahead and lined mine with parchment, just to ensure I’d be able to easily lift it out. Pour cherry mixture into lined baking sheet; set aside.

On a lightly floured surface, roll out remaining piece of dough into a 16-by-11-inch rectangle. Drape over filling. Bring bottom pastry up and over top pastry. Pinch edges to seal. Using a fork, prick top crust all over. Brush with heavy cream or egg wash.


Bake until crust is golden and filling is bubbling, 40 to 55 minutes. Transfer to a wire rack until just warm to the touch, about 45 minutes.

In a medium bowl, stir together confectioners’ sugar and milk, water or lemon juice (or combination thereof) until desired glaze consistency is achieved. Use a spoon to drizzle over top. Serve warm or room temperature.

* Martha had suggested 1 to 1 1/2 cups sugar for 6 cups of sour cherries. I balked, imagining my beautiful okanagan cherries drowning a syrupy death, and used 3/4 cup, which yielded a lightly-sweetened pie with the tartness of the cherries still coming through, just as we like. Please adjust this to your tastes, and according to the tartness of the cherries you brought home.


Some tips for replacing the sour cherries with other fruit: This pie is roughly 100% of a regular pie filling with 150% percent of the crust. Thus, if you’re looking to use something besides sour cherries, you can swap in 6 cups of any other fruit. Adjust the sugar accordingly — you’ll probably want less sugar with peaches or berries than you would with very sour cherries, or the same amount, if you like your pies on the sweeter side. (Remember, I kept this one very lightly sweetened.) Adjust the cornstarch accordingly too — peaches and berries usually let off more liquid than apples, but only slightly more than cherries.

One other route you can take is to use the filling part of your favorite pie recipe, as most standard fruit pies contain 6 cups of berries or chopped fruit. This way you’ll already know what spices, if any, you want to add and that the amount of sweetener and/or cornstarch/thickener is already spot-on.

All Butter, Really Flaky Pie Dough
Makes enough dough for one double-, or two single-crust pies.
2 1/2 cups flour
1 tablespoon sugar
1 teaspoon salt
2 sticks (8 ounces, 16 tablespoons or 1 cup) unsalted butter, very cold

Gather your ingredients: Fill a one cup liquid measuring cup with water, and drop in a few ice cubes; set it aside. In a large bowl — I like to use a very wide one, so I can get my hands in — whisk together 2 1/2 cups flour, 1 tablespoon of sugar and a teaspoon of salt. Dice two sticks (8 ounces or 1 cup) of very cold unsalted butter into 1/2-inch pieces. Get out your pastry blender.

Make your mix: Sprinkle the butter cubes over the flour and begin working them in with the pastry blender, using it to scoop and redistribute the mixture as needed so all parts are worked evenly. When all of the butter pieces are the size of tiny peas — this won’t take long — stop. Yes, even if it looks uneven; you’ll thank me later.

Glue it together: Start by drizzling 1/2 cup of the ice-cold water (but not the cubes, if there are any left!) over the butter and flour mixture. Using a rubber or silicon spatula, gather the dough together. You’ll probably need an additional 1/4 cup of cold water to bring it together, but add it a tablespoon as a time. Once you’re pulling large clumps with the spatula, take it out and get your hands in there (see how that big bowl comes in handy?). Gather the disparate damp clumps together into one mound, kneading them gently together.

Pack it up: Divide the dough in half, and place each half on a large piece of plastic wrap. I like to use the sides to pull in the dough and shape it into a disk. Let the dough chill in the fridge for one hour, but preferably at least two, before rolling it out.

Do ahead: Dough will keep in the fridge for about a week, and in the freezer longer. If not using it that day, wrap it in additional layers of plastic wrap to protect it from fridge/freezer smells. To defrost your dough, move it to the fridge for one day before using it.


6.29.2012

a lesson in rhubarb.

we had rhubarb growing in our yard.
it came with the house.
i have never tried my hand at cooking or baking with it and last year i let it waste away.
this year i decided to do something about with it.


i had no idea what i was doing to harvest it.
thankfully i have something called google ready at my fingertips and it helped out big time.
did you know that you twist and pull at the very bottom and it comes out quite easy? i sure didn't.
did you know that the leaves are poisonous?? i really didn't know that - i wonder who the poor person was who figured out that gem? poor them. :(

once harvested i took a minute, stared at it and went...now what?
it's such a strange and awkward fruit {vegetable?} that i know i like from eating it - i just have never prepared it. it looks like red celery.

first things first was to prep it - trim off the leaves, cut it into one inch chunks, set aside.


done. look at how awesome the green is against that raspberry type colour? stunning.
after some research i settles on three preparations that would suit us just fine.

fist up - freeze some. rhubarb comes but once a year and if i do happen to fall for what i am about to make, i would like the chance later in the year to re-create such a masterpiece.
i went the individual freeze method and here is what i did:
lay down wax or parchment paper on a sheet pan.
then evenly distribute your rhubarb across the pan in one layer.
pop it in the freezer till the pieces get frozen hard. dump the contents {minus the paper} into a freezer bag and toss in your freezer for safe keeping. easy peasey.


now i have this much left and i am going to use it, by jove! 


after much search i came upon a crumble recipe done by steph over at stephmodo and instantly knew that was what batch #2 was destined for.
after a few tweaks here and there {you know me!} i came up with something that i am quite excited for and now very happy i have a batch of rhubarb hanging out in the freezer.
{and i really like how it looks in my new crate & barrell baking dish. love c & b!}


strawberry rhubarb basil crumble.
adapted from stehpmodo.

this crumble asks for basil - this is optional - i really didn't taste the basil i put in so if you have none on hand please do not let this stop you! if you do have some, please use it and let me know if you tasted it!! maybe i have had too much hot sauce in my life for the delicate flavour it offered. 
who knows.

1.5 pound strawberries, hulled and halved.
1 pound rhubarb, cut into one inch pieces
9 basil leaves, julienned {
1/2 cup of sugar.
1 tablespoon plus one teaspoon of corn starch.
the juice from one half a medium lemon.
pinch of good kosher salt.
1 cup of oats
1/2 cup brown sugar
1/2 cup flour
another pinch of good kosher salt.
1/2 cup of butter, cut into small cubes.

pre-heat oven to 425 degrees. source out your best 8x8 style baking/serving dish.

carefully stir together the first seven ingredients in a large bowl. dump into your dish.
in a new bowl stir together your oats, brown sugar, flour and salt. blend butter into your topping with a pastry blender to create pea sized clumps of topping. distribute evenly over the top of the fruit mixture. pop it into the oven and bake till top is golden and the fruit is bubbling - about 35 minutes {oven to vary. bake to 35 minutes then go from there.} let cool slightly then serve warm with a scoop of vanilla ice cream or a dollop of vanilla sweetened whip cream.

*****************************************************************************************************

now on to batch #3 and what to do there.
still licking my lips from the above culinary experience i really wanted to do a combo again.
this week is quebec strawberry week.
i had no idea.
i picked up the most glorious flat of strawberries bursting with sweetness and enormous flavour.
perfect.
and more perfect? experiencing that flavour in december/january when the snow gods have descended upon us.
that perfect taste of our summer.
it's settled - jam. beautiful jam.
i have already eaten one jar. it's so good.
one day we smeared it on this bread and another day it was destined to accompany pumpkin waffles {recipe coming soon...still tweaking that one...can't get the spice quite right...}


strawberry rhubarb jam.
via canadian living

i really liked this recipe for the small amount of sugar. the downside - it said it made 7 jars and i got 4. bummer. but that's not stopping me from making another 2 batches this weekend. it's that good.
in my humble opinion.

2 cups hulled crushed strawberries
2 1/2 chopped rhubarb
1 package pectin crystals {if you can get light - that's better}
2 3/4 cups granulated sugar

Pour strawberries and rhubarb into large Dutch oven.

Combine the pectin crystals with 1/4 cup of the sugar; stir into pan. Bring to full rolling boil over high heat, stirring constantly. Stir in remaining sugar; return to full rolling boil. Boil hard for 1 minute, stirring constantly.
Remove from heat. Stir for 5 minutes to prevent fruit from floating, skimming off foam.
Using sterilized metal funnel and 1/2-cup (125 mL) measure, pour into hot sterilized 1-cup (250 mL) canning jars, leaving 1/4-inch headspace. If necessary, wipe rims. Cover with hot lids; screw on bands fingertip tight. Process in boiling water canner for 5 minutes. Remove jars and let cool, undisturbed, for 24 hours. Check for seal, ensuring that lids curve downward. (If not, refrigerate and use within 3 weeks.) Store in cool, dry, dark place for up to 1 year.

******************************************************************************************************

so there you have it - a study in rhubarb.
i learnt something new.
i hope you did too.

the weekend is here already!!! this weekend is canada day so we will be hanging with friends at the festivities then having everyone over here for our second annual canada day barbeque.
i am hoping this is going to catch on and be our yearly "thing".

:)

how about you? any big plans?
happy weekend! xo


6.22.2012

wonderland cakes.


for aydan's birthday i wanted to do something extra.
something unexpected.
something a little different.
we made wonderland cakes.

what are wonderland cakes you ask?
they are rainbow layered cakes baked in jars, naturally.
they are the type of cakes that one would expect to see in wonderland.
layered colour upon colour upon colour. vibrant and wonderful.
something unusual and perfect for this tea party.

they fit in magically.


i had seen this done before and piggy baking on her idea i made my own version. {she had used a cake mix - i did not. she used pastels - i went for vibrant.}
i loved this.
the kids loved it.
they were the perfect addition.
and they tasted great!
that's the main thing right?
but the look does count for something as well.....you gotta give me that!


wonderland cakes {baked right in the jar!!}
makes 16 jars.
top these with my classic buttercream icing. yum.

18 tablespoons of unsalted butter - room temperature
3 cups sugar
6 extra large eggs - room temperature
1 cup sour cream - room temperature
1 1/2 tsp pure vanilla extract
1 lemon - zested
3 cups all-purpose flour
1/3 cup cornstarch
1 tsp kosher salt
1 tsp baking soda
lots of different gel colours - i use gel because you get maximum colour with little dye - you can taste dye if you use too much.

16 x 250 ml canning jars
ziplock style sandwich bags - as many as as many colours you want.

preheat oven to 325 degrees. wash and dry your jars - i used 250 ml canning jars for this.
plus have your ziplock bags ready.

cream the butter and sugar on medium till light and fluffy. scrape down the bowl then while mixing add your eggs one at a time. scrape down bowl then add your sour cream, vanilla and lemon. mix well on low.

sift together the flour, cornstarch, salt and soda. slowly add the flour mix to the wet mix. finish by hand to make sure it's all incorporated but being careful not to overmix.

dived the batter up between bowls and add your colour and mix gently. pour your coloured content - one colour per bag - into your bags. now you add them to the jars. when the process is done you want your batter to fall somewhere between 1/3 of the way up the jar and half way up.


also you might want to clean up your sides - we seemed to skip that step!
now pop them in the oven for 45 minutes. seems like a long time but that's the time!! then remove from oven and insert a tester in them to check that they are done. let them cool completely on the tray on a wire rack, ice them and close them up! a tip: do not add sprinkles to them {if using} till just before you serve them - if left over night some brands end to bleed into the icing and those they do not serve in wonderland!
hope you enjoy!

5.31.2012

kitchen tips: maple cinnamon bun bread pudding.


i know what you re thinking even before you do....
a recipe in kitchen tips?
she's crazy!
but don't worry it get's better.
trust me.

so you know when there are those times when you forget about those cinnamon buns you had made? or bought?
and they turn stale on you and you are going to eat them because you don't want to waste them but really do you want to waste the calories forcing those down? or you bought some and you really didn't care for them as they are?
{you're probably thinking right now...what? leftover baked goods? this is kind of like the leftover wine into vinegar tall tale...left over wine - what leftover wine?}
so yes for those times - or in my case the-time-i-made-cinnamon-buns-that-i-was-not-too-proud-of-because-they-sat-in-the-freezer-too-long-and-didn't-rise-properly-but-i-didn't-want-to-throw-out-the-ingredients time?
that's the time i am talking about here.

so.....

to make a long story, i guess even longer {ha!}, here is my tip:

make them into bread pudding!!!
re-use and recycle! 2 of the 3 r's.
they take to this beautifully and make an awesome dessert.
i would not steer you wrong.
i hate to waste food {hate it!} so i came up with this and i hope you enjoy it!
even better with homemade vanilla ice cream but one thing at a time i think!
;)


maple cinnamon bun bread pudding. {say that 5 times fast!}

8 cups of torn up cinnamon bun parts (or you could any other kind of baked good or fruity baked bread}
2 cups half & half or light cream {you could also do 1 cup heavy cream and one cup skim milk - i did that.}
1/2 cup pure maple syrup {you can increase this to one cup but i found my cinnamon buns sweet enough already.}
1/2 cup packed brown sugar - only if using an unsweetened fruit bread.
4 eggs
2 teaspoons pure vanilla extract
1/2 cup of raisin {optional}
and depending on the flavour in your cinnamon buns you may want to add:
2 teaspoons of cinnamon
1 teaspoon of nutmeg
3/4 teaspoon of all-spice

whisk together your cream, eggs, syrup, sugar {if using}, vanilla and spices {if needed} in a large bowl. add your bread pieces and raisins {again...if using}. turn the pieces around in the cream/egg mix to coat completely. cover and chill for at least 1 hour. overnight is okay.

preheat oven to 375 degrees. lightly grease a 9 x 13 glass dish. pour your bread mix into the prepared dish, toss on a sheet pan {always!!} and place in the oven, uncovered, for about 40 minutes or until golden on top and a knife inserted in the top comes out clean {if you feel it needs more time but it's getting too brown on top - toss a piece of foil on top and check every 5 to 7 minutes. another tip for you today, free of charge!} cool on a wire rack for 30 minutes. serve warm with vanilla ice cream, sweetened whip cream or your favorite custard. and of course a drizzle of pure maple syrup.

12.22.2011

pecan almond bars.


around the holidays i always find my self craving three things - cookies, chocolate and nuts. nuts. usually i am not a big nut person - actually there were years where i had no interest in them altogether. but more and more they have called to me and crept back into my life. i have wanted them back into my life.

the cold of winter to me means more rich foods - stews, chickens, hearty soup's, shepards pie - and the meaty plump flesh of nuts in baking fits that criteria to a "t". don't get me wrong, i eat them in the summer as well - beautiful toasted then tossed on salad's - but i don't have such a want for them as i do in the colder comfort-food months. when i make my plan for the holiday eating season - yes i call it that - i plan out what nuts we want to use and go from there. i don't think of what i want to make and then get that, i think of what ingredients i want to eat and source out how to get them from a to b. i am always trying to find new ways to fit them in and this one hits all the marks. caramel. butter pastry crust. thick layer of nuts.


this was a recipe passed to me by my mother and i believe to her by her mother - the legendary betty whyte {no, not that one}. i was always excited to get to my grandma's house to see what baked good she had whipped up for us for the duration of our stay. she was a mater at all things baked and mostly things that would fit into the 1950's era of baked goods. for years i thought that she made up the name for nanaimo bars because she always made them for us and she lived in nanaimo and that is the only place we ever ate them - that i had ever seen them. it wasn't until years later when i saw some in the grocery store in vancouver that the idea was squashed. but i have gotten off topic.

nuts. pecan to be more specific. and sliced almonds. a winning combination - the perfect pair. i made these a couple of weeks ago for two functions and had people asking me for the recipe so i have decided to cave and share. one tip though - add them to your dessert buffet last because they will be the first thing gone and then no one will have any room for anything else - they are that good!


pecan almond bars
for the crust:
1 cup plus 2 tablespoons of unsalted butter, room temperature
3/4 cup packed light brown sugar
1/2 teaspoon of salt
3 cups all-purpose flour

filling:
1/2 cup unsalted butter
1/2 cup packed light brown sugar
1/4 cup + 2 tablespoons of honey
2 tablespoons of white sugar
2 tablespoons of heavy cream
1/2 teaspoon of salt
1 cup pecan halves - toasted
1 cup sliced almonds - toasted
1/2 teaspoon pure vanilla extract

1) make your crust: pre-heat the oven to 375 degrees. put butter and brown sugar into a mixer with the paddle attachment and mix on medium until light and fluffy, about 2 minutes. mix in salt. add flour, 1 cup at a time until fully incorporated. continue mixing dough until it begins to come together in large clumps.
2)press dough into a 9x13 glass cassarole dish {i run a strip of parchment under the crust to allow easy bar removal after baking - about 7 inches wide 16 inches long} making your layer about a 1/4 inch thick. pierce the dough all over with a fork and chill for 20 minutes. bake until golden brown 18 to 20 minutes {i do it for 20}. transfer to a wire rack to cool. reduce your oven to 325 degrees.
3) toast your nuts: place them on a cookie sheet in a single layer and pop them in the oven while it reduces for about 6 to 8 minutes giving it a shake at the 6 minute mark. remove from heat and let cool slightly.
4) make filling: place butter, brown sugar, honey, white sugar and heavy cream in a saucepan over high heat. bring to a boil, stirring, until mixture coast the back of a spoon, about 1 minute. remove from heat and stir in salt, nuts, and vanilla. pour filling onto the cooled crust.
5)bake until filling bubbles, 15 to 20 minutes {i do 20}. carefully transfer to a wire rack to cool completely. run a paring knife around the edges of the pan to help release the bar and using the parchment overhang lift bar out of pan and place on a wire rack to cool completely. using a sharp knife cut into 1 by 3 inch bars. bars can be stored in an air-tight container at room temperature for up to one week.

10.05.2011

halloween cookie bar.


fall is upon us and with that in my mind comes desserts and cooking with pumpkin. now i can make a mean pumpkin pie {praised highly by shirley which made me feel like i had won a prestigious award thank you very much!} but i feel a bit sorry for the pie as it has been slightly cast aside. pumpkin pie. check. now what? i have been spreading my wings and actually have come to realize that the last pumpkin pie was made years ago and i believe it was the one shirley tried.

this year is no exception. with thanksgiving this weekend, pumpkin's everywhere and halloween on the horizon the scent of desserts are in the air. literally. i smell sweet desserts everywhere. or maybe i am thinking about them so much that i have convinced myself? well anyway, anyone close to me is benefiting as i am having this overwhelming urge to test, bake and savour.

with halloween looming {and me off the hook for thanksgiving} the kids and me pulled out our collection of martha's halloween magazines to make our list of crafts and sweet we are going to tackle. while flipping i came across a recipe i can't believe has ever escaped my gaze and that i have never made. well this couldn't go on any further. so...i made it and it was worth every bite!


of course with every recipe there is some tweaking and this was no exception. although i adore martha's recipes, this one i liked more for the concept and changed it to how i thought it was better suited. generally i tweak her recipe's as i find she doesn't like some things as sweet as i do or she uses ginger too much for my tastes. in this recipe i liked the richness that the pumpkin offered but changed around a few things and i think the results were top shelf.

i posted this picture on facebook of it right out of the oven, still in the pan and cooling and was flooded with requests for the recipe. so ladies...here you go!!

halloween {pumpkin chocolate chip} cookie bar.
adapted slightly from martha stewart.


these are so wonderful and casual i am snacking on one right now as i write this and you should go and make some now!! c'mon go and get ready!! i'll wait!

2 cups all purpose flour
1 1/2 tsp of cinnamon
3/4 tsp of ginger
1/2 tsp nutmeg
1/8 tsp allspice {as close as possible}
1/8 tsp ground cloves {as close as possible}
1 tsp baking soda
1/2 tsp salt
1 cup of salted butter, room temperature
1 1/4 cups sugar
1 large egg
2 tsp pure vanilla extract
1 cup canned pumpkin puree {not pumpkin pie filling!}
8 ounces semisweet chocolate chips
6 ounces m&m's because they are the best but you can use other coated chocolate candy if you want!

1) pre-heat your oven to 350. lightly butter & line the bottom and side of a 9x13 inch baking dish with parchment paper, leaving an overhang on two sides.
2)whisk together flour, spice, baking soda and salt.
3) beat butter and sugar with a mixer on medium-high speed until pale and fluffy. beat in egg and vanilla, then the pumpkin puree {mix may appear curdled}. reduce speed to low and beat in flour mix until just combined. fold in chocolate chips.
4) spread batter in pan. sprinkle evenly with m&m's. bake, rotating pan halfway through, until the edges begin to pull away from the side of pan and a toothpick inserted in the middle comes out with a few moist crumbs, 35 to 40 minutes. let cool completely in pan on a wire rack.
5) using parchment overhang, lift cookie bar from pan. peel off parchment and use a serrated knife to cut into 24 squares.

9.26.2011

my dirty little secret.


i have a secret. a dirty little secret. something i have not really announced to the world - have kept to myself - but some people have actually found out about and have decided to follow me around with it.

i spend my time doing it and am addicted. i really didn't need one more thing to take up my time on the computer, in my day. life - but how can you resist? i have my usual hit list and sometimes i find it trying to connect with those wonderful writers and creators on a daily basis but once i explored this world i could not resist throwing my hat in the ring and hoping, hoping for an invitation. a vip - if you will - into this addition. into this world of inspiration. it's one giant place that does not take up space in my house or computer that i can save and display all the lovely things in find in the giant world wide web that i want to stare at, savour, soak in the inspiration from and one day attempt. it's perfect and i love it.

it's called pinterest and i am an addict. hi my name is jen and i have been a pinterest addict for months now. i am coming clean. i love this site. love it. i have "pinned" my boards with ideas for the home or crafting and recipes to savour or for your sweet tooth generously offered by other members or have procured some of my own blog or while exploring the web.

i am excited to soon launch a series here on my site called the best of pinterest where i will do something that i have pinned and that has inspired me. sharing all my pinterest goodies!!

have you started "pinning"?

9.20.2011

all that remains.


i tried. i really did. between back to school, puzzles, trampoline time, big brother finale, art projects (we made these guys again!) and homework i really tried to get that fabulous magazine worthy photo if the ice cream i actually made myself. yes you read it right. i made ice cream.

and it was pretty darn good.

the seed for this endeavor was planted 4 years ago when the husband gifted me with the much coveted kitchen aid mixer for my 30th birthday. with this purchase came the ice cream maker attachment which he presented to me along with the mixer. with BIG THANKS i gladly accepted the present and starred at it with starry eyes.

how it actually looked before i prettied it up. the sad remnants - although that should account for the taste because it disappeared so fast!

fast forward four years and the 2nd part of the gift was put to good use. finally. i have thought about this over the years but it seemed like such a daunting task and yes it actually takes two days to make! well it took me two days. now - i am a planner but this required serious planning. with a sweet result of course.

worth every second.


for my birthday THIS summer we visited the ben & jerry's factory since we were in vermont and since i am crazy about ice cream. i love ben & jerry's - used to be my curled-up-in-bed-after-the-bar guilty pleasure. and for my gift i bought the official ben & jerry's homemade ice cream and dessert book. armed with this (although i do have the williams sanoma book as well) i vowed i was going to make ice cream before the summer was through. i cracked open the book and got to work on the sweet cream base - the most popular - hoping to get that exquisite signature taste. upon reading the recipe i drew one conclusion - something was wrong here. the recipe for this base calls for raw eggs but then it does not go to show the cooking process. what?? they don't cook the eggs??? so i called up the hotline in the book - the factory it turns out - to ask them about this. yes, i actually called them. and after asking and waiting i was told to use my favorite ice cream base instead of theirs because they haven't changed the recipe in the book to account for the eggs today. and yes they cook theirs at the factory. what????? i don't have a favorite ice cream base - i bought the book so i could get a favorite ice cream base, to make theirs not so i could find it from somewhere else! totally lunacy.

so i took a step back and being the clever girl that i am i figured it out and still using their recipe i made the ice cream. and it's awesome. i am now totally stoked and inspired to make more. soon. when i have two days to plan. and since i can hear fall knocking at the door and found it had snuck in through the window the other day and kissed me on the cheek i think a pumpkin variety is in order.....


jen's cookies and cream ice cream.
adapted from ben & jerry's version.

the base used here is universal. prepare this as your standard "vanilla" and then the world is your oyster! except i wouldn't recommend oysters....yeah....no. to this you can add all sorts of treats, nuts, syrups...anything! follow my instructions though and add them at the appropriate moment. the possibilities are endless!

makes one quart.

vanilla base
2 large eggs
3/4 cup sugar
2 cups heavy or whipping cream - chilled
1 cup whole milk
2 teaspoons of pure vanilla extract or half a vanilla bean.

extras
1 cup coarsely chopped oreo style cookies.

in a medium glass bowl (suitable for double-boiling) whisk together the eggs until light and fluffy - about 1 to 2 minutes. add the sugar and whisk until combined. set the bowl over a pot of simmering water but do not let the water touch the bowl! cook, stirring constantly with heatproof spatula until the eggs feel hot to the touch - this is tempering your eggs. meanwhile have your cup of milk heating in a pot next to you until searing hot but not boiling. once hot, slowly slowly pour into the egg mixture while whisking constantly. once all mixed in pour your mixture into a second pot over a low flame and stir constantly with heatproof spatula, until the mixture has thickened to a pudding-like consistency, this is your custard base. once done pour into another bowl to start the cool down process. allow to cool slightly and then, while whisking, slowly add your cold cream. next pop it into the fridge for a minimum of 8 hours to allow to properly chill and set.

chop your cookies, place them in a bowl, cover and refrigerate.

once chilled transfer your mix to an ice cream maker and freeze following the manufacture's instructions. 

after the ice cream stiffens (about 5 minutes before it's done) add the cookies, then continue freezing until the ice cream is ready. place in a separate container and chill for at least 4 hours before eating.
**because this ice cream uses fresh eggs please finish it within 5 days of making....yeah like it will last past day one! but just in case.....


9.14.2011

a winning combination.


here we go. we are in the home stretch of saying goodbye to summer having one last dose of sun and humidity and i had to do it. i had to make the cake that had been on my mind all summer, so come late fall when i probably would have done it i don't look like a complete fool. late fall is for cranberries, apples, cinnamon...you get it - not lemon and blueberries.

oh - lemon and blueberries is, i think, my new favorite combo.

the way they went together was amazing. i'm still scratching my head as to why i have never gone this route before. it. worked. perfect.

i really feel like this has been my summer for lemons. all season you would be able to find lemons in decorative containers adorning my counters as i was wanting them at my fingertips as much as possible. wanting to remember them and use them. to take full advantage of their brightness and taste of summer. constantly juicing them and rasping them for their fragrant zest. savoring them.

baking is where i find my calm. the research, the reading, the planning, the hoping it will turn out. i love to create something and watch it be enjoyed for a grand celebration, a special tea party treat or just because. this was a just because kind of day. this was a friday that was like any other. a friday that marked the end of a long week, the first real week of school as well as it was gordon's birthday (our big hairy companion) and that in it's self was cause for a little celebration.

i used the strawberry cake i had told you about at the beginning of the summer as a jumping off point then i tweaked. and i tweaked. and then it was perfect. what an amazing base this is and so easy to work with. the ratio between lemon and berry was perfect. keeping the berries whole allowed some to burst in your mouth when you bite down - which was both surprising and luscious. this is definitely a forever cake that will be going into my rotation and i'm eager to tweak it to compliment the coming season.


lemon blueberry just because cake.
adapted from smitten kitchen.

now even though i call this a just because cake it can be enjoyed to mark then end of a fabulous meal as well. serve it at the end of a lovely steak, lamb or pork dinner when chocolate just might be a little too much and this will be a satisfying alternative completing the meal out perfectly. give it a light dusting of powdered sugar just before serving or if you want to go the extra mile, pair it with vanilla whip cream or homemade semifreddo. also served to a special guest or two at tea time would be a wonderful treat.

6 tablespoons unsalted butter plus more for dish.
1 and a half cups of all-purpose flour.
1 and a half teaspoons of baking powder.
half a teaspoon of salt
1 cup plus two tablespoons of sugar
1 large egg
1/2 cup milk, room temperature
2 tablespoons lemon juice
zest of one lemon (at least two teaspoons) - toss in a tsp of flour to separate them.
1 pound of blueberries. if using frozen make sure they are thawed, rinsed and dried.

pre-heat oven to 350 degrees. butter a 10 inch or 9 inch deep pie dish and set aside.

whisk together flour, powder, zest and salt. set aside. in a larger bowl beat together the butter and sugar till light and fluffy - about 2 to 3 minutes. add the egg and lemon juice. add 1 third of the flour mix and then the milk until just combined. add the rest of the flour mix gradually.

pour mix into the prepared pan and top with the blueberries covering the entire surface - i found not such a heavy concentration in the middle worked best. sprinkle the two tablespoons of sugar over top.

bake cake for ten minutes then reduce heat to 325 degrees and bake until golden brown and a tester comes out clean (some gooey fruit on the tester is okay), about 50 to 60 minutes. place on a wire rack to cool and cut into wedges and serve.

can be stored for two days, loosely wrapped at room temperature, if it survives the night.

7.27.2011

a taste of lemon: curd + tarts.

 lemon. such an obvious choice for flavour, taste and scent. to add brightness, texture and complete yumminess. and one ingredient around here that was reserved for fish and water only. until now.


years ago when our old faithful, martha stewart, landed her pretty little self in prison she cut herself off. no visitors except her lawyers and daughter i believe. but somehow that sneaky little rosie o'donnell got herself in there to visit her dear friend. they chatted about the experience not getting into it to much but just being there to enjoy each others company. during the conversation rosie asked martha what she is missing the most from her regular life as opposed to her prison life. and you know what martha said? she said she missed the taste of lemon. that's it. i remember watching this (i think on the view) and scrunching up my face and going what? how bizarre. that was before i succumbed to my legacy in this life and let food lead my path. now i get it. fully.

what power it has!! and how completely wonderful and enjoyable! i always seem to reach for the chocolate, the butter, the vanilla and the more rich fruits for baking and the peppers, onions, tomatoes and root vegetables for cooking but now i find myself reaching more and more for the lemon for both equally. and that has prompted this series of recipes that i want to share centering on lemons.

today let's talk curd. personally i think it is an awful name for something so delicious, so decadent. something that transforms before your eyes as you can't take your eyes off it for a minute. to watch it take form from a pile of ingredients - all stars in heir own right - and become something so brilliant, so yellow, so silky.

i had forgotten this taste as when i opened my specialty food shop and this recipe was a clear hit i was not the one producing it anymore - i had moved on to the deli/cafe food and had left someone else prepare the baked goods. and since then the baking bug had left me for awhile since selling and moving out east i took a little break from all things desserty but unfortunately for my hips and bum it has hit me harder than before


this other thing i love about this is the versatility of it. you can put it on anything to make it stand out from the crowd. fill a layer cake with it. top some shortbread cookies. bake off a sheet of puff pastry and smear it on top (technical term here!). stuff cupcakes. spread it on grilled pound cake - yes i said grilled pound cake!! (more on that later). add it to semifreddo. the list is endless and the taste will shock and amaze you everytime - every bite will feel like the first.


sweet life bakery lemon curd.
i only have one reservation about this - the butter. as i was making it i was tasting along the way so i could feel the impact from start to finish. on the last stage - where the curd comes together and before you add the butter - the impact of the lemon was outrageous! it knocked me over, fireworks on my tongue and i was begging for more. then i added the butter and the curd went down a note. little more subdued but still amazingly flavourful in every way. this is where i am torn as i believe a whole tart of the impact creating curd would be too much and the butter infused one was just right but i was left wanting more. but my hips thanked me for stopping. 

3/4 cup fresh lemon juice - about 6 lemons
grated zest of 2 lemons
2 large eggs
7 egg yolks
3/4 cup of sugar
4 tablespoons butter - softened

in a glass measuring cup measure out your lemon juice then add the zest as well to allow the zest to softened up and let stand for about 10 minutes.

in a medium glass bowl (suitable for double-boiling) whisk together the eggs, egg yolks and sugar until combined. add the lemon juice mixture and whisk once more.

set the bowl over a pot of simmering water but do not let the water touch the bowl! cook, stirring constantly with heatproof spatula, until the mixture has thickened to a pudding-like consistency, 6 to 8 minutes.

remove from heat and whisk in butter till emulsified. strain the mixture through a fine mesh sieve into a bowl. press a piece of plastic wrap directly onto the surface of the curd to prevent a skin from forming. allow to cool, then use immediately or place in a sealed container and pop it into the fridge for up to one week!

to make the tarts:
prepare one batch of my sweet pie dough (recipe below) and, using a 3-inch in diameter round cookie cutter, cut out rings from the rolled out dough. place each ring into a cup on a mini cupcake pan and press into the mold and pierce all over with a fork - place prepared sheets into the freezer and freeze for at least 1 hour/preferably though overnight. remove from freezer, place a square of parchment in each shell and fill with baking beans (you can buy special baking beans but i just use raw beans that are designated only for this purposed, live in a jar marked baking beans and are used over and over . pre-heat your oven to 350 degrees and bake off your shells for approx. 18 minutes or until the edges are golden brown and when checked the bottoms look cooked. pull out and let cool for 10 minutes, then remove beans, remove from pan and let cool completely. one recipe makes approximately 30 to 36 tart shells.
raw tart shells filled with baking beans prior to baking.

my sweet pie dough. 
after tinkering with other recipes and my tastes this is what i have come up with. enjoy.
3 cups all purpose flour
1 tablespoon of sugar
1 teaspoon salt
1 cup unsalted butter, cold and cut into small cubes
3/4 cups ice cold water

place in food processor the flour, sugar and salt - pulse a few times to mix up. place butter in flour mix and pulse a few times till butter roughly the size of peas/hazelnuts. while pulsing in quick short bursts add the water slowly (a drizzle) through top tube. as soon as dough comes together into a ball remove from processor and divide into two equal balls. flatten to a disk, wrap in plastic and refrigerate for 1 hour minimum. dough can be refrigerated for up to 3 days or frozen for up to three months. thaw in fridge before rolling out if using frozen.

makes 2 balls of dough. enough for two 9-inch single crust pies or one double crust.