Showing posts with label recipe. Show all posts

10.30.2013

agree to disagree about red velvet cake.


i don't know about you but i am a theme girl.
love to embrace the theme.
parties. holidays.
all about the theme.

almost by accident {and by almost i mean totally on purpose} it seems that i have shared a halloween dessert here every year and even though our new diet low calorie/low cholesterol way of life has no room for sweets, there are one or two exceptions to be made.

when up late brainstorming a wicked cool idea to share with you for this year {man i have to get a life! ha!} i thought of what i had done in years past - i have done pumpkin, then chocolate & pumpkin and chocolate - and decided it was time for something totally different. time to shake things up.
almost immediately i went to red velvet cake.
halloween. blood. guts. you get the idea.
one problem though - i had fallen out of love with my recipe. i made it last christmas and found it too dense and dry. very blah.

back to the drawing board.
cake testing time.
yes i could have scoured the web and found one that would do the trick but where is the fun in that?
woah is me, eh? life really does suck around here sometimes.
;)
thankfully not TOO far into the process we struck gold.
moist. springy. beautifully RED!!
right after getting this down on paper and patting myself heartily on the back, a few request for halloween style cupcakes for this week popped up - perfect timing!

hopefully they are a hit.
what kid doesn't want to bite into something that looks like it may squirt blood back?
well i know mine would! ha!

happy halloween!!!

ps : this is not a decorating post...i stink at decorating! awful. horrible. these were actually just regular cupcakes and i attempted to change them up - make them more halloweeny. just look at that eyeball!!! yes, that is supposed to be a monsters eyeball up there with the mummy and vampire bite......i tried.
{head in hands, ashamed.}
#theytastesogoodhopefullynoonewillnotice


re-thought red velvet cupcakes
for the icing i used my classic buttercream icing.

2 1/2 cups all purpose flour....you could also use cake flour is you want.
2 cups sugar
2 eggs
1 cup buttermilk
1/2 cup canola oil
2 tsp vanilla extract
2 tbsp cocoa powder
2 tbsp water
one good squeeze of red colour - paste form. if using liquid then a tbsp - you can always add more!!!
1 tsp salt
1 1/2 tsp baking powder
1 cup boiling water
1 tsp baking soda
1 tsp apple cider vinegar

pre-heat your oven to 350 degrees.
place liners in your trays and set aside {will make approx. 24 regular cupcakes or approx. 36 mini's} or butter and flour two 9-inch pans.

in your mixer beat together sugar, eggs and oil. add vanilla. while this is mixing mix together cocoa, water and colour in a small bowl till you form a paste. add to egg mix and beat until incorporated.

in a separate bowl sift together flour, baking powder and salt.

add you flour mix, alternating with the buttermilk, to your wet ingredients - starting a stopping with the flour mix. once this is fully incorporated add your boiling water. mix together.
now comes to fancy part - in a small bowl mix together the baking soda and vinegar. now fold that into the mix gently. this makes your cupcakes rise nice and high.

now carefully fill your cupcakes liners 3/4 full - mixture is really runny - tap your pans on the counter to release some of the air and place them in the oven. 12 - 14 minutes for mini cupcakes, 20 to 22 minute for larger ones and about 30 - 35 mins for cake rounds. cupcakes are ready when they spring back when touched on the top. let cool 10 mins in pans on rack, then remove from pans and let cool completely before attempting to decorate.


9.20.2013

recipe re-do: quinoa - a passing fad?


fads are everywhere. home. fashion. and yes - even food.
who could forget the great "make your own baby food" fad....wait that still around.
and the "farm to table " fad...hang on that's kicking around too.

well maybe there is something to say about fads.

the latest, i find, is about ancient grains. embracing grains other than the cherished rice and couscous {yet another "fad" that stuck.}

so i decided to stick my neck out and inquire - what's so great about quinoa? why is everyone head over heels for it? i put this question out on facebook - bluntly asking if i was in fact that last person around to try the stuff. the answer was a resounding YES!

i was trolling the aisles of costco the following day and found what i thought was a years supply of the famous grain {i have since come to realize it is a month's worth.} and gave it a try.

the first time i made it it was okay. just okay. i boiled it to the package directions and served it along side chicken. okay. i do see the appeal and it's a good sub for rice because it states it has protein and is good for you. tony asked if it was good for him, i told him yes and then he replied with, "okay if it's good for me i will get it down." shinning endorsement right there.

i decided to take a step back and re-examine my approach. i was schooled in getting coop to eat steamed broccoli by a friend of mine earlier that week - he ate hers, not mine - and the one thing she did different was seasoning. so i made the quinoa like how i make my fancy rice - chicken stock and onions. bingo.

new staple.

two saturdays ago i was enjoying my morning coffee and checking our rachel ray's new show about cooking one day for five. usually not my thing and she tends to do things to high fat for me but it caught my attention because she was talking about grains. then she was talking about obesity and getting out of the rut. i was listening. then she made what looked like the best hot salad i think i would ever put in my mouth.

i was right.

i decided at the end of the day to use her "recipe" as a base and go from there. all i knew of it was what i saw and could remember. it started with making the grain, then in another pan sauteeing together red onion, rasped garlic and lemon zest. instantly i was hooked. she had some other fancy things in there i did not have. i purposely went and got kale - a new favorite - and yes i did splerg on the mushrooms but didn't use as many as her at all. did i need to spend $5 on 6 shiitake shrooms? hmm - maybe not. would portabello's have been a good choice? probably. was it lacking in flavour because i have only the cremini and shiitake mushrooms and not the hen of the woods variety as well? well you be the judge.


seriously - i want to know how much you love it.
cause i know you are going to.

jen's fancy quinoa

1 tablespoon extra-virgin olive oil
1/2 a medium onion, diced
i cup un-cooked quinoa
2 cups low sodium chicken stock
freshly ground pepper

add your olive oil to a medium saucepan and heat over medium-low heat. add your onions. grind some pepper on them {you always want to season!} and sautee till translucent about 3 to 4 mins. add your quinoa and toss around with the onions while sauteeing them a little. then add your broth, bring to a boil, reduce the heat, cover and steam for about 15 mins {according to your package}, let sit fo 5 mins then fluff with a fork and devour!!

hot mushroom and quinoa salad
did you know that you have to strip the kale leaves from the stalks before preparing? i did not. 
thank you rachael for that. 

one recipe of Jen's fancy quinoa {above}
1 and a half pounds mixed mushrooms
1/3 cup ev olive oil
2 tablespoons chopped fresh thyme
freshly ground black pepper
3 to 4 garlic cloves, finely chopped or i like to use a microplane right over the pan
1/2 red onion diced
zest of one lemon
one bunch of kale, stripped and coarsely chopped
kosher salt and pepper
the juice of half the lemon you zested
1/2 cup sliced almonds, toasted


first things first, get those mushrooms in the oven! preheat it to 450 degrees and spread your mushrooms out on a sheet pan. drizzle with about 1/4 cup of the olive oil, sprinkle with the thyme and toss it together to coat.  grate some pepper over top and pop it in your heated oven. they usually take about 20 minutes to get all roasted and earthy.

meanwhile, after you made your quinoa, heat a deep skillet over medium low heat. add the remaining olive oil and once it's a little hot add your onions. get them nice and translucent then add your garlic {i grate mine right over} and zest your lemon right into the pan. heat this slowly on the stove {don't burn the garlic!} and just for a moment lose yourself in the aroma......okay snap out of it!
add your kale to the pan and let it wilt over top. season with some salt and pepper. once wilted remove from heat and fold in your quinoa. set aside.

toast the nuts in a small skillet till brown and fragrant.

once the mushrooms are done you are ready to assemble. first place your quinoa mixture into your serving dish, squeeze your half lemon over top, next spoon on your roasted mushrooms and, last but not least, top with your toasted almonds. voila!

this can be eated hot, room temperature or even the next day straight out of the fridge!


9.17.2013

fall is the time for food. {pumpkin spice waffles.}


there is something about the change in this season.
from summer to fall.
the crisp air.
the wind.
the shorter days.
all it makes me want to do is eat. all i want to do is create rich foods such as chicken & barley soup {last night's dinner.}, explore the many forms & flavours of grilled cheese and load ourselves up with hearty knock-you-back-to-sleep breakfasts.

i always find a recipe starts from somewhere and this one starts with a pumpkin spice latte.
no wait...lets back up a few years...this one starts with a little girl who would eat no fruits or vegetables but who was gaga for mom's pumpkin muffins.
yes, i think that's a great place to start.

so there is a little girl who refuses all such wonderful things such as fruits and vegetables and her parents worried for her. so her mother {played by me} thought and thought about how to get these foods into without her knowing - in the meantime she was also wondering how this happened since her mother had taken the time, in her early years, to make all the little girls baby food from scratch and the little girl did enjoy all these foods once upon a time. what had happened here?  
let's not get distracted, jennifer, that's another post for another time. 

it had never occurred to her mother to create such a thing as a pumpkin waffle - the girl loved her mother's waffles and she loved pumpkin muffins.....maybe, just maybe this would be a hit. maybe this was a sneaky way to get something, other than purple apple sauce, into her little girl thought her mother.

it worked.
they are her favorite.
and that makes her mother smile from ear to ear.


pumpkin spice waffles.
i added raspberries on top of mine this weekend for the first time and i don't think i could ever not do that again. over the top!

1 3/4 cups of milk {any kind - soy works too.}
1 cup of pumpkin puree {not pumpkin pie filling.}
1/4 cup of vegetable oil
1/2 teaspoon of pure vanilla extract 
2 eggs, lightly beaten
2 cups whole wheat flour {you can use regular but whole wheat is better!}
1/2 cup brown sugar
1 tablespoon of baking powder
1 teaspoon of baking soda
3 teaspoons of cinnamon
1 1/2  teaspoons of nutmeg
1/2 teaspoon of all-spice
1 teaspoon of salt

Combine milk, pumpkin, oil, vanilla and eggs in a mixing bowl.
Whisk till smooth.
In another bowl {or i sometimes just layer it on top of my wet mix} add the remaining ingredients and combine.
Add the liquid mix to the dry and whisk together till smooth. your batter will be quite thick.
let sit for 5 minutes.
Preheat your waffle maker. Once your maker is ready to go pour the batter on and enjoy!

don't forget the maple syrup!!!
makes approx. 24 square waffles.

ps: your house will smell divine - like you are swimming in a pumpkin pie!


7.17.2013

my new favorite pizza.


you know jenny from dinner: a love story? the lady who makes making dinner for her family seem effortless? {which i know that if she read this would roll her eyes right now.} she professes many a time that she is not the GURU we are all making her out to be but simply a mom trying to feed her family and enjoy their company at the same time.

something i think we all aspire to do ourselves.

for my birthday i was fortunate to get her book which i then preceded to devour page by page like it was a novel, not a cookbook. but it really is a novel but also a cookbook. maybe more of a biography....i guess what i am trying to say is that it's relateble.
yes...that's the word.
completely relateble.{is that even a word?...hmm...}

she shares her family experiences with her recipes woven through them that makes you want to make that one thing then and there.

when i hit the pizza section i knew i was going to try them all. i never knew, though, that i was going to stop at one and make that one over and over - changing it slightly as i go. it's so delicious that i can proudly say it's my new favorite. a hawaiian lover right to the ground since forever, my tastes have evolved over the years slightly to accommodate others but now...never having another slice - other than this one - suits me just fine.
this, coming from a former cooked mushroom hater, is a pretty big endorsement.

just sayin'.

my new favorite pizza
now this is a hybrid of my wants and jenny's original recipe. i'm not going to tell you which is which though...you have to buy the book and figure that one out yourself. ;)

one recipe whole wheat pizza dough
1 cup of your favorite tomato sauce {optional}
4 tablespoons of olive oil plus more for brushing
1 medium onion, sliced
1 1/2 cups mushrooms, halved and sliced
leaves from two sprigs of fresh thyme
1/4 teaspoon of red pepper flakes
a good pinch of nutmeg
salt and pepper to taste
1 8 ounce ball of fresh mozzarella, thinly sliced or at least 2 cups of freshly grated mozzarella {i like a little more} - not from a bag please!!! it really doesn't take too much time to shred your own!
freshly grated Parmesan cheese
1 to 2 cups chopped ham {optional}
chopped bacon {optional}

preheat oven to 425 degrees.

brush your pan with a tablespoon of the olive oil and sprinkle with cornmeal. now start stretching your dough. this will take a little bit. just keep working it out slowly and you will be amazed that it will fill the pan.

in a medium bowl, toss together the onion, mushrooms, thyme, pepper flakes, nutmeg, and salt and pepper with the remaining oil.

top the dough with either: the tomato sauce or a brushing of olive oil - depending on your mood and what you have on hand. top this with your cheese, covering as much of the surface as possible. top with the ham and/or bacon, if using {i do this sometimes and if i don't have any meat or leftover bacon on hand i will make it without - just as amazing!} brush your outer exposed crust with olive oil, stolen from the bottom of the pan, to achieve a beautiful golden crust. Bake for 20 to 25 minutes until cheese is bubbling and golden.

Add parmesan cheese just after it comes out, just before serving.
enjoy with your favorite movie and an ice cold beer.
perfect friday night.


{above is the non-tomato sauce version.}


4.16.2013

against the grain.


i am a firm believer that chocolate does not have to be involved in everything.
that one can get by without it. you can curb a sweet-tooth without it.
that given the right ingredients, everything can be lovely and wonderful. it does not always have to include chocolate.
especially in banana bread.
if you have beautifully dark over ripe bananas, the elixir which they contain should be enough.
i have stated this over and over and over. things have enough sugar already and we should appreciate them for it.

then you encounter the rainy day.
that day where darkness hang over and the thoughts of being cozy enter your mind and then that little pest - chocolate - creeps in there too.
a day where you would like nothing more than to curl up with a mug of something hot and a warm hearty baked good.
a day where banana snack cake with a hint of chocolate peeking through hits the spot.
it's the day where i eat my words....for just this one moment.


now this is not an everyday cake. it's not meant to replace our favorite around here. it's meant to be brought out on only very special occasion.
like a rainy day.
today is such a day.


banana snack cake.
it's moments like these where i wish my kids were nut people - biting into a shard of a toasted pecan would be a welcomed surprise - a pleasant little crunch. and if you have some laying around, a dollop of softly whip cream on top wouldn't be the worst either.

preheat your oven to 350. spray a 8x8 pan with cooking spray. set aside.

if you want to add toasted pecans now is the time to toast them. you will add 1/2 a cup plus 3 tablespoons of pecan halves or broken chunks to a pie plate. put in the oven for 5 minutes. toss and check. if not browned enough, put back in for one minute increments till you are sastified - DO NOT LEAVE YOUR OVEN! you will forget about them and have to start over only to find out that was all you have. not that i am speaking from experience or anything....
once they are toasted, let cool and chop into smaller pieces - split into two bowls - 1/2 cup and 3 tablespoons.

add 2 eggs to your stand mixer or bowl and blend slightly. add 3 bananas or one cup of mush to eggs and blend slightly. add a 1/4 cup of canola oil and blend slightly. {are you following the trend here?} add 1 tsp of pure vanilla extract. blend. add in 1/2 a cup of white sugar and half a cup of brown. blend. now add in 3/4 cup of whole wheat flour, 3/4 cup all purpose flour - unbleached!!! - 1 tsp of baking soda and 1/2 a tsp salt. gently blend this in. add one cup of chocolate chips or chunks and your optional 1/2 cup of toasted pecans. once all incorporated scrape down the sides with a rubber spatula and give it a couple turns by hand just to make sure you get all the bits in there. pour into your prepared pan,  sprinkle the top with the reserved 3 tablespoons of toasted pecans and bake for 55 minutes, rotating the pan half way through. let cool on a wire rack for 10 minutes, remove from pan and serve either slightly warm or room temp.

will keep for 3 days in an airtight container but we all know it won't survive the night.
;)


2.19.2013

creating amazing leftovers. {beef dip.}


i envy someone who has that magic touch with a roast. i get beyond confused, convoluted and then the only thing redeemable about the dinner are the side dishes and the gravy.
i am hopeless.

i made a great roast once but then lost the magazine with the recipe - instructions is more like it - and couldn't find it anywhere in print or cyber space.
i was counseled many a time on this and told all the secrets: push slivers of garlic into the roast {still haven't got that right} mixture of x, y, and z on the outside, sear, don't sear. it just never turned out right.
except for that one time.....well we can't dwell on that.

but i am not one to back down from a challenge.

there was a great sale on prime rib at the local METRO and i went for it. i couldn't not! it's like when you can't leave the store without those pants that didn't quite fit you right but they were 70% off and if you were just to lose a little weight maybe they would look great and you can't pass up a deal like this! that's how i am with a sale on food. that's why we have three freezers full plus i made half of the downstairs bathroom into a pantry. that's why i have banned myself from buying more than fresh and the everyday items we have run out of. WE HAVE TO DEPLETE OUR RESERVES!!! wait...what was i talking about again?

ah yes....the trouble with roasts.

so here i am facing this amazing little roast and my pulse quickens and my heart says yes. yes get it. you can do it.

so with a little help from martha i was able to get a pretty spectacular roast on the table.
it was a proud moment. and with that i got my roast recipe and it's perfect. check!
and...aydan ate some!!!! we had a talk with her and convinced her that all roast was was a hamburger before it was ground up and made into a hamburger. with a side of ketchup she reluctantly tried some - i think just to get us off her backs and then i think she had another plan in mind - but little did SHE know that she would actually like it, let a smile cross her lips, mutter yum and gobble it all up.
new dinner for the WHOLE family to eat.
a mom-makes-one-dinner-only night - double check!

i also did martha's humongous yorkshire recipe - now that was a sight to behold! - and of course the sauce made just as the recipe states.
**next time i am going to reduce the salt by half for the roast and also make the yorkshires in a muffin tin straight after the roast comes out but i will talk to you about that later.

but it was what i did the day after that had us all talking.
it was what i did the day after that made me wished i had made two roasts.

i had a recipe in mind, forgot half of it at the store, so i winged.
so happy with it. and one i can call all mine.
may be my new favorite!

juicy beef dip.
leftover sliced roast beef.
one cibatta bun per person
horseradish {optional}
one small can of consume
1/3 cup of leftover roast gravy {from martha's recipe.}

pre-heat your oven to 350 degrees.
slice your buns, spread with horseradish on one side if using, and lay your desired amount of beef inside {photo above is not just for your eyes only - that was my size}. make all your sandwiches, place them in a casserole dish - you want them in there snug but not squished so use what size you think necessary - cover tightly with foil and bake for about 20 minutes.
meanwhile make your dip. pour together your can of consume and your reserved roast gravy. bring to a boil, reduce and simmer for about 2 minutes to really get the flavours together.
after 20 minutes remove dish from oven and check on your buns. you want them to be soft but a little toasty and hot. if you are satisfied take them out - if not, put them back in for 5 minute increments till the desired effect it reached.
pour dip into small bowls, place on plates, add sandwiches and enjoy!


2.13.2013

a cake built for two {plus enough for two short stacks.}


okay now let's switch gears.
yes i know i just told you to eat chocolate for breakfast. that valentines is all about chocolate...but you can have too much of a good thing, right?
don't you think after making the pain au chocolate, indulging in some afternoon chocolate hearts {it is VALENTINES after all?}, thankfully accepting some chocolates from your kids, husband, significant other...don't you think by 5pm you may be over chocolate just a little bit?

thought so.
ladies {and gents}...start your engines!

who doesn't enjoy a little lemon in winter?
helps with the blues. awakens the taste buds. provides us with memories of summer and sunshine.
perfect.

here i am going to let you in on my little secret...my lemon cake.

i once doubted myself about it once upon a time. i thought since i didn't have my own cookbook how could mine be any good? i should defer to the lucky and use their recipe. it's in print, has a gorgeous photo beside it. love. so i made it. i made it for a dinner party and i actually served it to people. as i took my first bite i felt my face fall. it was disgusting! how could i serve this to people?! more to the point - how could i take this away from them without them knowing and freeze time just like in out of this world, whip up THIS version and serve that instead?! WHY had i doubted myself?!

because that's my M.O. i have no confidence in myself most days. i question my decisions over and over and go to THAT place all the time. yet i know i have the skills and what i make IS delicious. i served this in my bakery for pete's sake! it was a hit! but i guess sometimes the grass is always greener......

plus i have mad respect for anyone with a cookbook - i am sort of a cookbook junkie. a collector as it were. but i knew better. in the back of my mind i was questioning why i wasn't just making mine and why was i making one that contained shortening? oh well, live and learn. so now you may question my validity here and ask yourself if mine is good enough for YOU. well i have made this enough times since to say yes it is and if you are not satisfied i shall refund your money, no questions asked. i understand. believe me.

my one hurdle with this cake - or any cake! - is the decorating.  i am not a cake decorator by any means. i think i missed that gene when they were passing them out. i can make a mean cake that will have you talking forever {yeah i know - a little full of myself there! ha!} but....you will never be talking about how pretty it looked. ever. because they are not. maybe it's that i am shaking too much after sampling the icing every 5 seconds. or that i tend to rush that part. fact is: i suck at it and i am okay with that. if THAT is my one fault {here i go again! i'm on a roll} then i can live with it.

seriously.

come to think of it i may start a new trend that doesn't require any decorating at all - deconstructed cakes. a chunk of cake here. a blob of icing there. some filling drizzled over the top, coulis style.
done.
not meant to be pretty and you won't agonize over it.
it will be all the rage.
i'm so cool.

;)

make this for your friends and family. they will thank you for it & love you too.

happy valentines to you and yours.
xo


meyer lemon buttermilk cake with lemon cream cheese frosting, lemon curd and a healthy dose of sweetened shredded coconut {toasted if you dare!}

the original design on this cake was inspired by stephmodo and a similar one she had made - using different taste elements though. i have gone through the steps over and over may times on how she assembled it and i am calling bulls*%t. no way she got this to be like that. no way. as she is practically perfect in every way i will give her credit on most things but i will not believe this worked for her. do it this way: schmear a blob of lemon curd over the plate and lay your slice on it sideways gently nestling it into the bed of curd.
lemon cake, deconstructed. boom!

1 cup unsalted butter - room temperature.
2 1/2 cups all purpose flour - spooned and leveled.
1/2 tsp baking powder
1/2 tsp baking soda
1/2 tsp salt
1 tbsp meyer lemon zest {using the zest you have in your freezer right??}
1 1/2 cups sugar
2 large eggs
3 large egg yolks
2 tbsp meyer lemon juice {ditto.}
1 cup buttermilk

sweetened shredded coconut.

lemon curd. recipe found here.

lemon cream cheese icing. recipe below.

for cake:
preheat oven to 350 degrees. butter and flour your tins. this recipe will make 2 9-inch rounds, 12 regular cups cakes. lots of mini's and enough for 3 3-inch layers {found great little spring form tins at homesense!} and about 20 mini's.

in a medium bowl mix together flour through to zest. set aside.

in a mixer with the paddle beat together the butter and sugar until fluffy. add eggs and yolks one at a time till incorporated. add lemon juice to buttermilk. alternating, starting and ending with flour, add the flour mix and buttermilk to your butter mix. mix until just combined and smooth.

divide batter among your pans - being sure to weigh your pans if doing cakes - and place in your pre-heated oven. bake cake layers for 35 minutes, cupcakes for 20 and mini's for 12. let cool for 10 minutes on a wire rack. run knife along edges of pans and invert cakes on to wire racks to cool completely. brush with lemon syrup while still warm if desired.

lemon syrup you ask? that's a baker's secret that i am going to let you in on! you know how you get a bakery cake and they are so moist and you never seem to get that effect at home? simple syrup is the secret.
1 cup of sugar
1 cup of water
boil this together over medium and then reduce heat and simmer for 10 minutes. remove from heat and cool slightly. for lemon now add a 1/3 of a cup of lemon juice. poke your cake with a wooden skewer or fork all over and brush with syrup. repeat a few times if you want. save the rest for later.
there you go...the big secret!


assemble your cake: trim off top, if needed, flip over so the flat bottom is up and place you cake on a cake stand or platter with parchment or wax paper tucked underneath {so you can pull it out when you are done and have a clean surface. everyone will wonder how you got your cake up there!} and brush with more syrup if you want. now spread 1/3 to 1/2 cup of frosting on the top and sprinkle the top with coconut. place the second layer on top and do the same {only add coconut here if you are going for three} and if you are going for three do that now but don't top with coconut yet. now ice the outside of the cake {crumb coat first, chill for about 20 minutes, then finish icing} and top to make one gorgeous white cake and then cover the entire outside, pressing it in, and top with as much coconut as you want!

lemon cream cheese icing:
8 oz of cream cheese - room temp
1/2 cup of unsalted butter - room temp
1 1/2 to 2 pounds of icing sugar - sifted into your bowl
2 to 4 tbsp of lemon juice

beat together the butter and cream cheese till smooth and incorporated. slowly add 1 1/2 pounds of your icing sugar and lemon juice. after adding in all your lemon juice decide whether you need more stiffness in your icing or not. if it's too runny add some more icing sugar a little at a time.


a valentines treat.


valentines is a time to embrace the chocolate.
welcome it in. treasure it. enjoy it.
i adhere to this philosophy. these teachings. {and for arguments sake, because we are all friends here, i may take a dry run at the practice a week or two ahead of time - just to assimilate myself.}
anyways, valentines. chocolate. the two go hand in hand. end of story.

so why not start the day out with it? brilliant!
in a perfect world we would all wake up with perfect hair, make-up in place, tip-toe out of the house at dawn, rush out to our local patisserie and pick up the most delicately beautiful pain au chocolate {chocolate croissants.}, sneak back in, put on coffee, display them a la martha stewart, await your crew in the kitchen, smile on your face and collect our awards for mother of the year.
blah, blah, blah......

but this is not a perfect world and you are not going to sneak out to do this.
but....you can make these and place first-runner up. trust me.


rockstar.


jen's quick pain au chocolate.

1 sheet prepared puff pastry
1 pure chocolate candy bar (at least 100 grams or the equivalent in chocolate chips.}
1 egg - for an egg wash to make it all golden and shiny!

defrost your sheet of puff pastry in the fridge overnight. 
pre-heat your oven to 425.
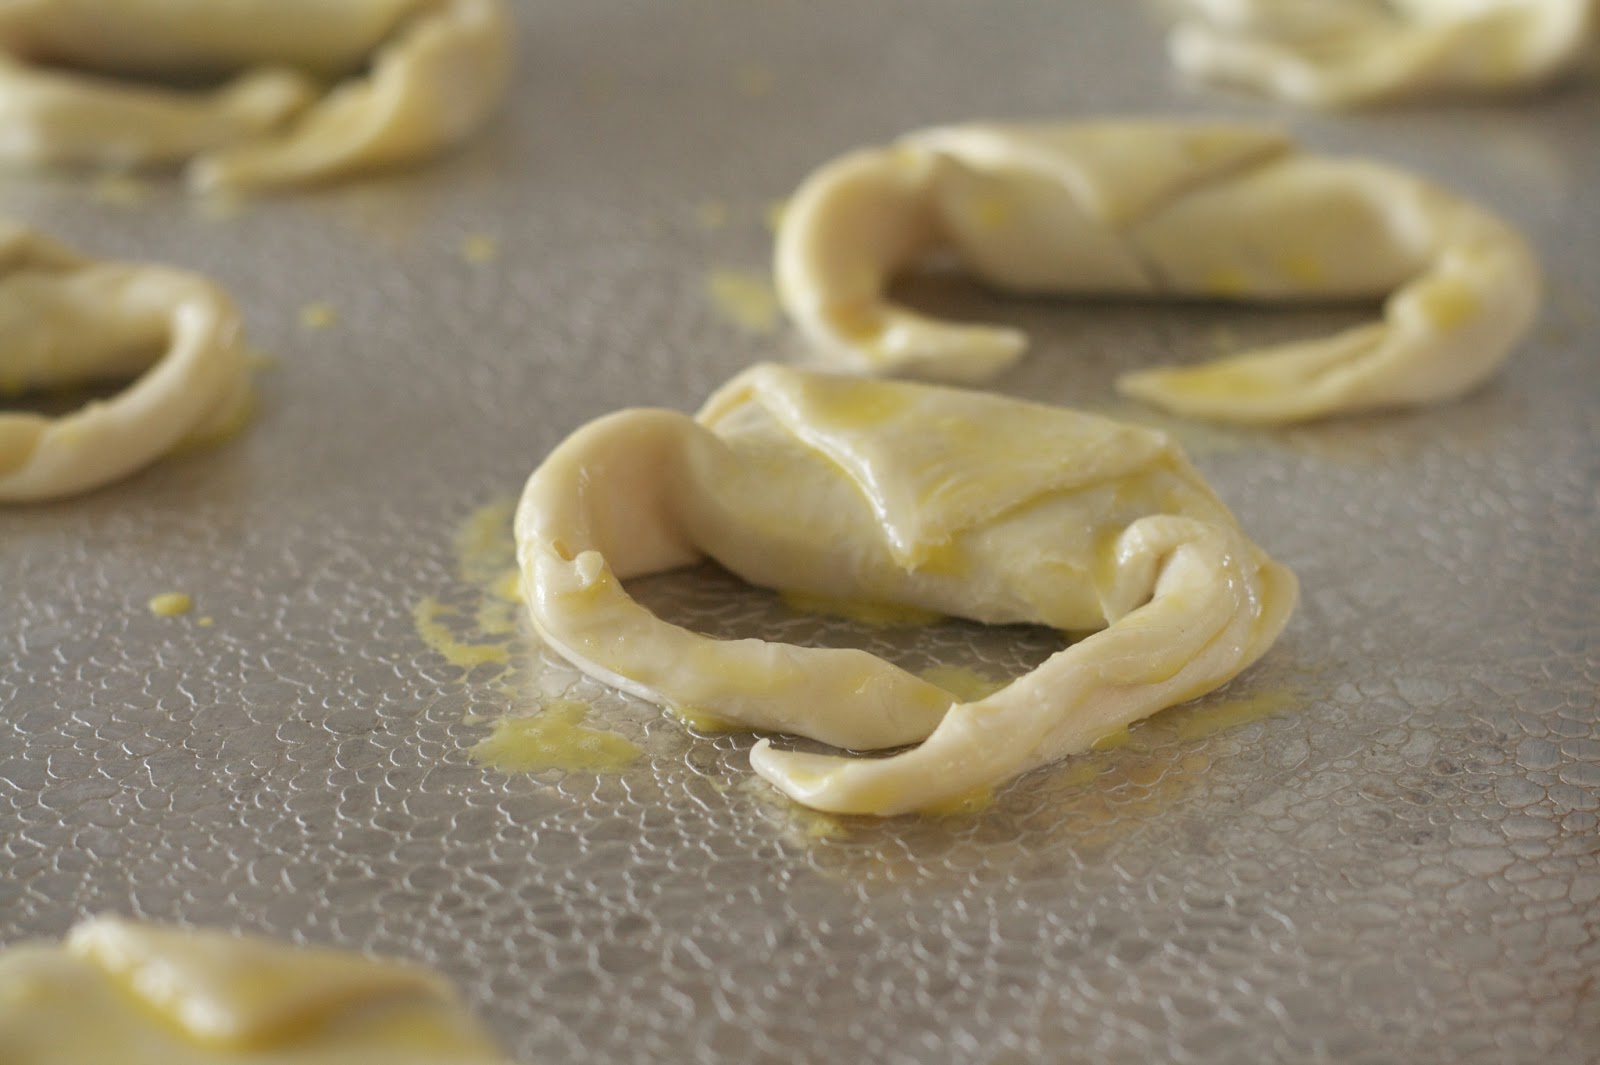
roll it out on your cookie sheet, keeping it on the paper. cut it in four equal parts then cut each square on the diagonal into two triangles.  lift your triangles off the paper and on to your sheet - you could leave them on the paper for now if you want. place a block or two of chocolate {or pile of chips} at the longest part of the triangle and roll it gently into the pastry. curl your ends around - you want to make sure your chocolate is sealed inside. ***with puff pastry you have to work fast. if you find your pastry getting too soft toss the whole sheet in the fridge to firm up - about 5 minutes. place your croissants equally over the sheet and brush with an egg wash - lightly beat your egg in a bowl and using a pastry brush paint your pain au chocolate - then place in the fridge for 10 minutes to chill. remove and bake for 10 to 12 minutes until golden brown. if they are not golden after this time bake them for 1 minute increments till you are satisfied. pull out of oven let cool on a wire rack for 5 minutes, remove from pan, serve and take in the compliments.

happy valentines day!
xo


2.06.2013

when one is blue; make bread, not war.

this place is my happy place.
i try to make it a rule that what i let out to the world is happy, joyous. wonderful.
sometimes it's to the point where tony asks if he could live in the blog. ha!

but can you indulge me a little today?
today i am blah.
lately i have been blah.
i am so tired. i am down on myself. i am just.....down.
this house is such a mess that it's hard to figure out where to start.
there seems to be a bit of everything everywhere...i keep running across things in rooms that have no business being there. they were not cleared by customs for their trip around the house and it's starting to get under my skin.
and the kids rooms! oh. my. goodness. if the governement got wind of what was going on in there they would declare a state of emergency and we would all be evacuated to seek high ground. i would love to go in there and purge and buy storage solutions and get it in order but...a)this is a no spend month and b) that's not teaching them anything.  it's just driving me nuts. and i am afraind the course we are one is one for not - i don't think they really care.
i know this is not glmorous talk for a wednesday and i should be preparing for valentines, baking something fabulous and sharing some links that i have found around the web for cool crafts and gifts but i am not.
i am drowning in the state of this house.

so what is the natural course for one to take when they are down? make bread of course.
oh yeah and eat WAY too many chocolate chips.

thanks for listening.


the recipe i used is found here. she did such a good job in explaining the steps and sharing her own story i thought she could tell it in her words.


1.22.2013

christmas shortbread made in january and not eaten as one would expect it to be.


at christmas time there were grand plans. days were to be set aside for baking. enjoying . merriment. in reality though the days were spent shopping, finally getting the decorations up, caring for those who were puking. one little girl finally decided on the 23rd what her wish might be - 7 stores were then combed on christmas eve for said gift only for the wrong thing to be bought and since returned and a newer shiner version will be bought as a collaboration for christmas AND her birthday. so this being said not all good plans are done...is that the saying? i can't remember. who cares.
this year christmas came too fast and too furious. before we knew it - it was over.
{i still haven't sent out my cards...epic fail!}

since those days of cheer i have had a lump of dough staring me in the face everyday tauting me - what's going on here? are you going to make me or what?

then came one morning as breakfast was being made where enough was enough. i was tired of feeling like the christmas failure in where the only treats consumed over the holidays were store bought. this house was going to smell like christmas dammit...even though christmas was over weeks ago. the oven was cranked, the dough pulled out and tony looked at me puzzled "you're baking?" yes. in the middle of everything this was going to happen.
by hook or by crook.

they were made, cooled, sliced, photographed and devored. not like you would expect - settled with a mug of something hot for dipping, a nice conversaion or just watching the snowflakes silently fall. slowly. delicately. with care and thought.

nope.

they were scoffed down amidst the screaming. crying. pandemonium of everyday.

but they were delicious. i long for more.

maybe today is a good day for more.....


shortbread.
this recipe was written down and placed in my binder cookbook so i really do not know where i got it from. i am not going to claim it as mine but i can't give credit either. but it's delicious..trust me. 

1 cup unsalted butter, room temp + a little extra for your pan
2 cups all purpose flour
3/4 teaspoon of salt
1/2 cup sugar {you could use icing sugar as well.}

pre-heat oven to 325F degrees. butter a 8 or 9 inch round or square cake pan. set aside.
sift together the flour and salt.
in your electric mixer cream butter until light and fluffy. add sugar and beat together for about 3 minutes. scrape down side, beat another minute, scrapes down sides again {i know i know, enough with the scraping!} and add flour mix, pulsing till incorporated as to not fling flour everywhere!! {i am NOT speaking from experience here...this is just a tip.} halfway through give the bowl a scrape and beat together a few minutes more till it holds together once squeezed.

press your dough into prepared pan, score into wedges and prick it all over with a fork. this is delicate, do not picture your bosses face or react to your kids constant screaming.....poor dough.

bake until firm in the middle and slightly brown around the edges - about 50 minutes. be your own judge - it may take longer depending on the oven. once done place on wire cooling rack till cool, pop it out of the pan, cut it into wedges and please eat it properly. do not do as we do.

;)


1.18.2013

two new dinners this week.

so i keeping with the these of my goal list - side note: i have actually liked this project! i have referenced the list many a time when i find a moment and re-focus on the tasks i have laid out..although we are tackling a task that was marked down for next month but oh well, starting off february with a red line through something will be good for moral! and today i am doing number 4 on the list so that is refreshing!

anyways, one of our goals was to try two new dinners a week. i have been noticing a trend on this in the last couple of weeks. dinner:a love story conducted her own experiment - 7 new dinners over 14 days - and donuts, dresses and dirt are starting a mealtime bootcamp.
this here is my contribution.

last week we were successful in trying two new dinners and this week we did not fall short.

i made a crock pot chicken teriyaki and tonight we are having stromboli. also we had a new-ingredient-to-us side dish of soba noodles. i was hoping to share the recipe on that one with you but the recipe site i had pinned was momentarily down, so...no recipe. i ended up just sauteing the cooked noodles with green onion and thinly shaved celery with dashes of soy sauce and rice vinegar. sesame oil would have been brilliant drizzled over top but we were out. bummer. i paired it with our asian pork - perfect match.

two out of four enjoyed the chicken - i thought maybe it was a bit salty and i would have liked the sauce to be thicker but tony loved it and cooper said he did like it he just wasn't in the mood for it, aydan no way. tonight as it is friday and we all know what that means..PIZZA NIGHT!!...i am going to put a twist on mine and tony's a whip up a stromboli. cooper might have some of ours - who knows, he is a funny egg sometimes that one. i tried to convince aydan to let me do it to her cheese one but she said no thanks. maybe if this turns out well i will just do it for her next week...shhh!!!

so there you go - another week, another two dinners. for sunday i am going to do a twist on chicken and stuffing via everyday food. it's not really a "new" dinner to us but...it's a new cooking method.
would that count? hhmmm.....

did you do any new dinners this week? i would love to hear.
happy cooking!


picture #1 via lake lure cottage kitchen, picture #2 via dinner: a love story


1.15.2013

the best patty.


today was just a burger making kind of day.


best burger base patty.
this is the perfect patty for a classic burger or one with unique toppings. nothing fancy in here just perfect seasoning that's satisfies the craving or complements the accompaniments. does it's job perfectly. add extra's if you want...the worlds your oyster. except i might stop at oysters...i don't know if i would go that far....

1 pound lean ground beef
1/4 cup panko crumbs
1 egg
6 dashes of worcester sauce
a scant 1/2 teaspoon of kosher salt
6 grinds of pepper.

add all the ingredients together in a bowl. smoosh together then form your patties as big or small as you would like. barbeque - top rack, pan fry - medium-high with a little olive oil in the pan to start or bake - 425, lower rack, 20 minutes. just make sure they are well done - at least 115 degrees inside.
enjoy!

or you can be like me and blow through 4 pounds of meat making pre-made patties for the freezer while watching the hunger games. stacked them two across with wax paper between the rows and place into ziplock bags...makes weeknight last minute burger dinners so much easier!!!

:)


1.11.2013

meal planning, goal #7 or the week the heavens decided to shine down on us.


so as in every week with this life of mine meal planning is huge part.
i make a list at some point before i do the weekend shop and make sure that those ingredients are in there somewhere as to not exude stress on myself for completing said meals to the hungry hippos that nip at my feet nightly.
in theory this is a great idea.
i am ALWAYS stressed out at dinner time. always.

the main reason for this...living with a picky dinner and the fact that i would like to eat something more complex than mac and cheese. the fact there is two to sometimes three different dinners happening nightly doesn't help. or when the question, upon inspecting the ingredients laid out, "what i am I having for dinner?" is posed...nails on a chalkboard for me. this is why i am stressed out.
wouldn't you be?
this has to stop - now!

this also ties in with goal #7 - make 2 new-to-us dinners each week.

as a lover of cooking, baking and all things extraordinary to do with food, this goal is one of my favorites. but also my scariest. i sat down, scanned the internet and books and found two i wanted to try. they seemed simple enough and maybe just maybe 3 out of four would agree. and maybe, just maybe, four out of four. wouldn't that be nice.
now i understand this is not going to happen overnight and rome was not built in a day but we can't carry on like this. we just can't. i can't.

so the task was to find something that could be tweeked for grownups and maybe i just have to make one extra elements for kids but the fact is WE WOULD ALL HAVE THE SAME DINNER.
down on paper this sure looked good...would it work in real life though?

over the christmas break we made some major headway in this department that i was confident we might have a breakthrough pretty soon. that we were headed down a new road. that there was light at the end of the tunnel that sometimes resembles something straight out of the hunger games. although no vegetable or fruit was consumed {other than motts purple apple sauce and pumpkin muffins}; spaghetti with tomato sauce was given the thumbs up, ham dinner was enjoyed with yummy sounds and prime rib {recipe soon!} was devoured - of course after being convinced & finally believing us that this was just a hamburger in it's original state.
this was caused for celebration and we actually did high five and yell yahoo. this was AMAZING!

but it doesn't stop there.
this is were is gets exciting.

this week i went for it and added two new dinners. one for everyone and...IT WAS A HIT!!!!! chicken parmesan! from scratch! not chicken strips out of a box!!!! yummy sounds were heard and the plate was cleared - linguini with tomato sauce and all. and it was asked for again!!!
i wanted to start crying. i was loaded down with "this is the best ever!" and "wow this is so yummy." i did seriously take a moment and almost shed a tear - my heart was bursting.

the second dinner was enjoyed by three out of four critics and thankfully i had some chicken leftover from the other night for the fourth judge. it was jamie oliver's one-tray bake - chicken + bread + some veg. a strange host of ingredients which went together perfectly and again reminded us as to why he has such a dynasty. this was gobbled up and voted to be kept into rotation. two hits in one week. and one with the picky girl that i live with.

to me this spells success.
walls are coming down people. doors are being opened.
i feel like singing loud for all to hear a whole new world from Aladdin. that's how monumental this is.
this deserved a pat on the back. and i gave myself one.

you can find the recipe for chicken parmesan here. i coated the chicken with the olive oil option and used seasoned italian bread crumbs - i couldn't find whole wheat and was lazy & didn't want to make any.
jamie oliver's chicken can be found here. my one tip with this is that i would have cooked the chicken for at least twenty minutes more at this temp OR raised the temp to 400 for the allotted time. we like our chicken cooked just a little bit more.

these, plus more delicious recipes we enjoy, can be found here and here.

thanks for stopping by! xo

photo one - me. photo #2 -jamie oliver magazine. photo #3 - skinny taste.


1.10.2013

greek with envy.


raise your hand if you have one recipe that seems to completely evade you and a friend who whips it up perfect every time.
.
.
.
oh i forgot you can't see me...i am raising my hand.

you see i have this friend who i used to gaze at through rose coloured glasses {i haven't seen her for awhile so i don't know what the colour would be now...probably still rose...} and for the most part she could do no wrong. especially when it came to making greek salad. she was a natural. a blooming chef! i always got excited when the trip over to her place included standing over a bowl of greek salad in the kitchen and catching up...oh you didn't realize when we were "getting dinner almost finished" that's what we were doing? huh, bummer.

anyways...she made it so awesome! and no matter how many times i tried to join together oil, vinegar, oregano and garlic...the failure was epic. epic i tell you. and then i felt so worthless and tiny. why couldn't i do it? why couldn't i make a greek salad worthy of a dinner party??? why??!!! what skill was i missing?

you know what i NEVER did? not once and i realized that was my first mistake....
I NEVER READ A RECIPE ON IT!!! oh my goodness.

so i read a bunch of recipes, changed a few things up - cause that's what i do {my husband doesn't call me sally under his breath for nothing...} - et voila! perfect greek salad.
phew - i'm glad that's taken care of. check!

then i went ahead and added pasta and roasted prawns....just cause, you know, it had to be done.
c'mon - you knew that!

jen's perfect greek salad with pasta and roasted prawns.
one of the first times i served this i got an "you MADE this dressing??!!" out of my sister-in-law, i think that says it all right there.

salad:
2 pints cheery or grape tomatoes - sliced in half.
2 red peppers, cut into chunks.
2 yellow peppers, cut into chunks.
1 long english cucumber cut in half lengthwise and the seeds scraped out and then sliced in 1/4 to 1/2 inch slices.
1/2 red onion, sliced thin they quartered.
1 cup of kalamata olives, preferably pitted but don't have to be.
cubed feta cheese - as much as you want!

pasta - optional - i use the rotini but you could use any shape you want - farfalle, penne, ??? i can't remember all the names! ha! i usually make about a pound of dry then add as much or as little as i want when it's all cooked.

dressing:
3 cloves or garlic, minced - i like a lot of garlic, you can tame it back to two cloves but i found one is definitely not enough.
1 tsp of dijon mustard
1 tsp of dry oregano - smoosh it in your hands on it's way to the bowl to help release it's oil and flavours.
1/2 tsp of kosher salt.
start with 1/2 tsp of ground black pepper - go from there. i use about 12 grinds.
1/2 cup olive oil
1/4 cup red wine vinegar

roasted prawns:
1/2 to one pound of prawns - or really as much as you like! but you want to make sure they lay in one layer in the pan so you may have to do two batches.
olive oil
minced garlic
chopped parsley - if you have it! no big deal if you don't.
pepper
salt {optional}
cast iron skillet.

here we go:
first stack your salad. start with one vegetable and work your way through adding the feta last to your dish. now make your dressing: add the garlic, mustard and oregano to your bowl. add in your vinegar then slowly, while whisking, add you olive oil - this is called emulsifying. pretty fancy eh? yeah i know some stuff. add your salt and pepper, wait a few minutes, dip a piece of lettuce or pepper or cucumber in there to taste it - that's a good tip i picked up - and re-season if you have to.

now add this to your salad, toss and chill for about one hour before serving so the flavors come together.
now make your pasta. i use the rotini usually. cook it according to the box instructions. cool it to just warm - not hot! it will take all your dressing then - and add it to your salad while it's in the chilling stage or really whenever, but for best results you just want to make sure your pasta is a little warm and not completely cold...but it can be cold if life works out that way.

now for the prawns - this is to be done while plating. they get tossed right on top of the salad on the plate/bowl.
shell your prawns and place them in a bowl. top them generously with olive oil, minced garlic, chopped parsley and salt and pepper. toss together and let sit.
turn you oven to 400 degrees. spray your pan with pam and once it's heated place your pan inside for 10 minutes. after 10 minutes remove from oven and add your prawns to pan- making sure they are in one layer on the pan - place pan back in oven and bake for 5 minutes. remove and spoon prawns directly on to salads.
and don't forget: take all the praise! you made this...you deserve it.

;)


12.20.2012

santa's workshop.


today is the day.
teacher present day.

every year i make the presents and every year they are very well recieved. the principal of the kids school tells me that she meticulously eats the granola i give her at end of year and christmas so "it lasts her six months till the next offering." since hearing such a nice comment i decided to double her bag - cause now it's from two kids! ;)

the school my kids go to is kind of amazing with the teachers giving their all and completely loving their job and the kids. it kind of helps too that they think my kids are pretty rad. in my books, anyone who thinks that deserves a big bag of sweets!

some of what i made is from yours truly and some has been inspired from pinterest.

hot chocolate kit.


i have seen many of these around - single serving and enough for a group. i combined a few i saw into what we gave out. hot chocolate mix on the bottom, then mini chocolate chips, then mini marshmallows and finally some crushed up candy canes {i put these in a little baggie as they are for a particular taste.} and to add that something extra  some chocolate dipped wooden spoons for stirring and striped paper straws for sipping!

whole wheat pancake mix.


my secret recipe. this, my granola and my cupcakes were the first thing i started selling when i started my business. i have been handing this out for years and the recipe is off limits...sorry!!

maple granola and cranberry crunch granola.

maple granola pictured.
big hits! and again...top secret recipe. i wouldn't even give it to my mom! ha!

honey orange cranberry sauce.


in late november i made a large batch and canned it for this very purpose. to can the sauce - sterilize your jars and lids. pour warm sauce into hot jars and place in canning pot. process for 20 minutes, starting from when the water starts boiling again. perfect for christmas dinner!

hot fudge sauce.


my new secret weapon! this sauce is amazing and i will be letting you in on it in the next couple of days. come back for it - you won't be sorry!

shortbread. {not pictured.}

last year we handed out this version but this year i went plain, simple, classic. and nobody does it better than martha!!
{i did the fingers but didn't dip them.}

cranberry almond bark.


this is something i have been doing for years! like i think about 15 years. i started out using white chocolate because it definitely looks more festive but since i can't stand the stuff i have changed to milk. when this recipe was first developed it was determined by price not measurement. i knew what i wanted to spend so i mapped it out that way. a few years later i went with my dad to the store to get the ingredients and as we approached the bulk section he asked my what i needed. i answered him "$6 of chocolate melting wafers, $3 of whole unsalted almonds and $3 of cranberries." he stopped dead in his tracks, looked at me and proclaimed "that is the craziest recipe i have ever heard." in turn i said "well - that's all i want to spend." yes i could have said 1200 grams of chocolate, 200 grams of cranberries and 200 grams of almonds...but where is the fun in that? plus a girl has to budget - especially at christmas time!!!
{please don't judge the recipe by my picture...my kitchen got hot so the chocolate heated a bit causing some white colouration!! oops!}

cranberry almond bark
1200 grams choclate melting wafers or your favorite chocolate
200 grams dried cranberries
200 grams whole unsalted almonds

first toast your almonds. pre-heat the oven to 375. spread the almonds out on a tray and place in oven for 5 minutes. pull out toss on tray and place in for another 3 minutes. pull out once more and if you think they need a little more {like me but i don't know that strength of your oven!} place them in for two more minutes. remove from oven and let cool.

once they are cool melt your chocolate. place your chocolate wafers or chopped up chocolate bits into a heat proof bowl and either use a double boiler or microwave. i use the microwave. i heat it for 30 seconds, pull it out, stir it and then place back into micro. i then repeat this in 15 seconds intervals. yes this sounds horrendous but it doesn't burn your chocolate and you will be happier for it. once it's all melted add in your cranberries and almonds {you may have to upgrade to a larger bowl at this point.} then pour onto a pan covered in parchment - sides too! - then put it in a coerner of your kitchen and forget about it. let in harden. once nice and hard, lift it off the parchment slightly and smack it down. keep doing this till it breaks into your desired sized and number of pieces. bag it up and hand them out!!

cinnamon stars.


these were something i saw on pinterest and had to do them ourselves. each one of our packages will have one of these with them as well. and did you see the ribbon? it was such a score from pick your plum - merry christmas from the gronick family - personalized ribbon? yes please!

our tags.


i love christmas cards. i love the design and the sentiment behind them. what i can never do  is bear to part with them so i thought if i turned them into something else and spread their cheer that would be awesome. so i came up with this - using the covers of old cards as new tags for our gifts.
perfectly festive and to quote mooseletoe... so perfectly perfect.

what are the teachers on your list getting this year?

happy holidays from us to you!

xoxo

12.07.2012

christmas truffles.


growing up we always indulged in holiday baking {kind of hard not to when your dad owns restaurants and your mom is a caterer}. there were points where the kitchen counter could not be seen for the abundance of ingredients and one would wonder how such delicacies could be created from such chaos.

fast forward 15 years and not much has changed. we still create an abundance of baking every year. we still create in chaos. sometimes the ingredients change with the times, the trends, the market. but some classics stick with us...these are such gems.

i remember absentmindedly scooping, rolling, dipping and placing trays and trays of these as we all gathered around the kitchen counter and gabbed about the goings ons - who was going out with who, who was fighting with who, who wanted to do what, who wanted what for christmas....you know - teenage stuff. and through all this, before you knew it, trays of these truffles had been made and no one really remember how we got from point A to point B. they were then wrapped up in cellophane or placed in pretty boxes and put in the fridge for when the occasion deemed them necessary. or they were eaten on the spot while the conversation between mother and daughters continued....that special moment when the walls were dropped, conflict left the building and laughter was let in.

this year i decided to add these to our givings as they are so simple and yet so special at the same time. i can't wait till the day i can have that same experience with my kids.

that's the magic of christmas.


chocolate truffles.
one recipe chocolate ganache - well chilled
a baking tray covered with parchment
a glass of warm water
a melon baller, optional, or teaspoon toppings, any of the following:
icing sugar
cocoa
sprinkles
finely chopped toasted nuts
toasted coconut

create one recipe of my chocolate ganache. make sure it is well chilled. in small bowls place desired toppings - one with icing sugar, one with cocoa, one with toasted coconut etc... . with your melon baller or a teaspoon, which has been dipped in your glass of warm water, scoop out a small ball of the ganache {about the size of a quarter maybe a little bigger - one bite}, roll it between your hands to create a smooth ball, put in the bowl of your choice, coat with topping, remove with a fork - by lifting it out not spearing it - place on tray and repeat. **icing sugar balls need two dips - i have found the first layer tends to get soaked up by the chocolate. once all the ganache is used, place your trays in the fridge to firm up the truffles. keep refrigerated until ready to use - remove from fridge 30 minutes before serving.

**if you notice that your chocolate is getting too soft during the balling stage, place your bowl back in the fridge and run your hands under cold water. wait about 5 minutes and the resume.

**to toast coconut: pre-heat your oven to about 300. place your coconut on a tray or cake pan. place in the oven for no longer than 5 mins {maybe shorted depending on your oven}. toss and let cool.

**for the nuts do the same at the coconut just have your temperature at 350.